
SSU – WordPress Amazon S3 & Wasabi Smart File Uploads Plugin Plugin
Upload WordPress files directly to your Wasabi & Amazon S3 bucket with ease.
Amazon S3 – Wasabi Smart File Uploads plugin allows you to upload local files directly to your Amazon S3 & Wasabi bucket using a custom file upload. You don’t have to upload files to your server first anymore.
Amazon S3 – Wasabi Smart File Uploads plugin offers the following features:
Upload multiple files directly to Amazon S3 & Wasabi at once
Amazon S3 – Wasabi Smart File Uploads uses a smart way to upload multiple files directly from your local to S3 bucket at once without occupying server storage. Also, you don’t have to worry about “exceeding the maximum upload file size” issue since we support up to 5GB for each upload file.
You can upload files as an admin or grant other users permission to upload files to your bucket as per our instructions in the FAQ section.
Configure & list files on your Amazon S3 & Wasabi Bucket
Our plugin provides a friendly UI allowing you to view all your Amazon S3 and Wasabi directories and files within the WordPress admin dashboard.
You are able to configure your own Amazon S3 bucket and choose where to upload your files to. There is an option to display other directories in your defined bucket as well.
You can select and copy your S3 file URL by clicking the “Copy File URL” button.
Upload files from WooCommerce Dashboard & Dokan Dashboard
Our plugin integrates with WooCommerce and Dokan plugins to allow users to upload files from the product pages, in addition to our settings page.
Upload files from Frontend
Use the following shortcode to allow users to upload files on the frontend website to Amazon S3 or Wasabi bucket directly.
[ssu_upload button="Upload to S3"] Use these hooks to allow front-end users to upload public files, show uploaded S3 URL or upload their files to a specific folder in S3.
Upload duplicate files
By default, when you upload files with the same name to Amazon S3, it will overwrite the existing ones. This behavior might cause data loss especially when you allow file uploads by multiple users.
Our SSU plugin helps you handle the issue by adding suffixes to duplicate files.
In case you want to keep the default behavior of Amazon S3, simply add the following custom code to your (child) theme functions.php file:
add_filter( 'ssu_enable_unique_file_name', '__return_false' ); Manage Wasabi & Amazon S3 files within WordPress Media Library
You can add not only new file uploads but also existing S3 files to WordPress Media Library.
All files uploaded via our plugin are private by default. It means no one can access these files directly even when you set your bucket public.
These S3 files can be managed just like other WordPress media files. For example, you can select and insert them into content through Add Media while editing any page and post.
Delete S3 files from WordPress Media Library
By default, removing the file’s copy in the Media Library won’t affect its original version on the S3 bucket. To remove S3 files from WordPress Media Library, you can define the following constant in your wp-config.php:
define( ‘SSU_WP_REMOVE’, true ); Make S3 files public with Smart File Uploads Plugin
For security reasons, all file uploads via our plugin are set private by default. That means no one, even admins, can access the files directly. To make a file public, simply select the option when uploading a file, or choose a file and click the “Make File Public” button.
Protect WooCommerce Products hosted on Wasabi & Amazon S3
Simply insert a raw Wasabi or Amazon S3 URL for files hosted on a private bucket into WooCommerce Product File URL. Our plugin will automatically generate an expiring signed URL for users to download the file after purchase.
If you need any help with the plugin or want to request new features, feel free to contact us through this form or drop us an email at hello@profaceoff.com
Please check out this guide on how to upload files directly to Amazon S3 bucket within WordPress admin.
Installation
There are 2 easy ways to install our plugin:
1.The standard way
- In your WordPress Admin, go to menu Plugins > Add
- Search for “WordPress Amazon S3 Smart Upload”
- Click to install and then activate plugin
- Access Upload to S3 menu under Media
- Follow the instructions to set up your AWS access keys and configure
2.The nerdy way
- Download the plugin (.zip file) on the right column of this page
- In your WordPress Admin, go to menu Plugins > Add
- Select the tab “Upload”
- Upload the .zip file you just downloaded
- Click to install and then activate plugin
- Access Upload to S3 menu under Media
- Follow the instructions to set up your AWS access keys and configure
Screenshots

Configure your own S3 bucket and path
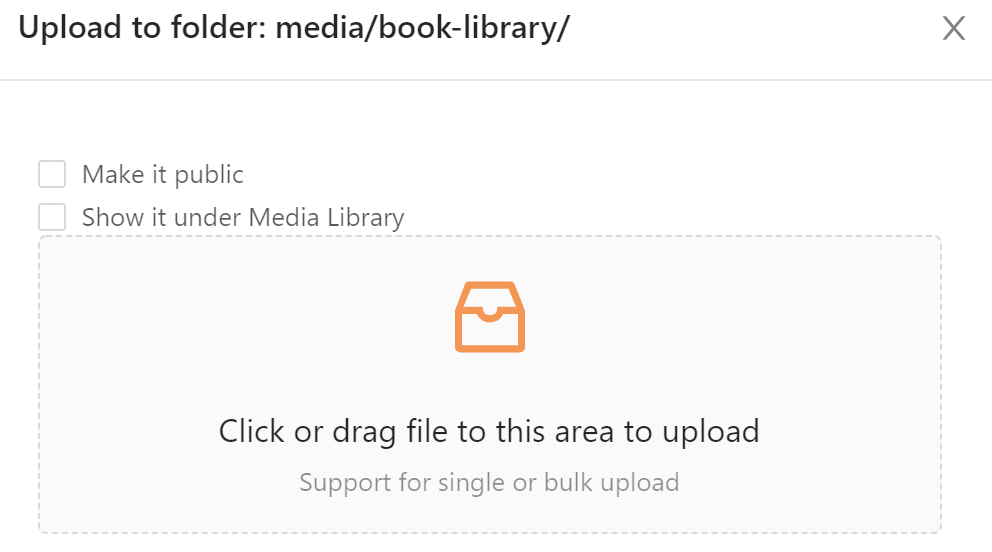
Upload numerous files directly from your local to Amazon S3 bucket at once with our custom file upload
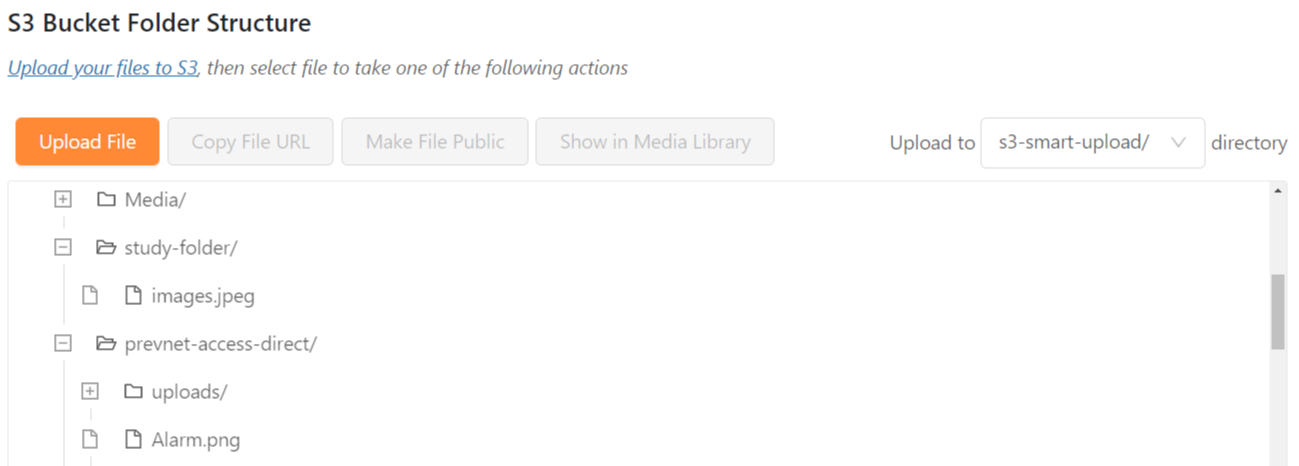
View all your uploaded files in S3/Wasabi bucket in the panel below
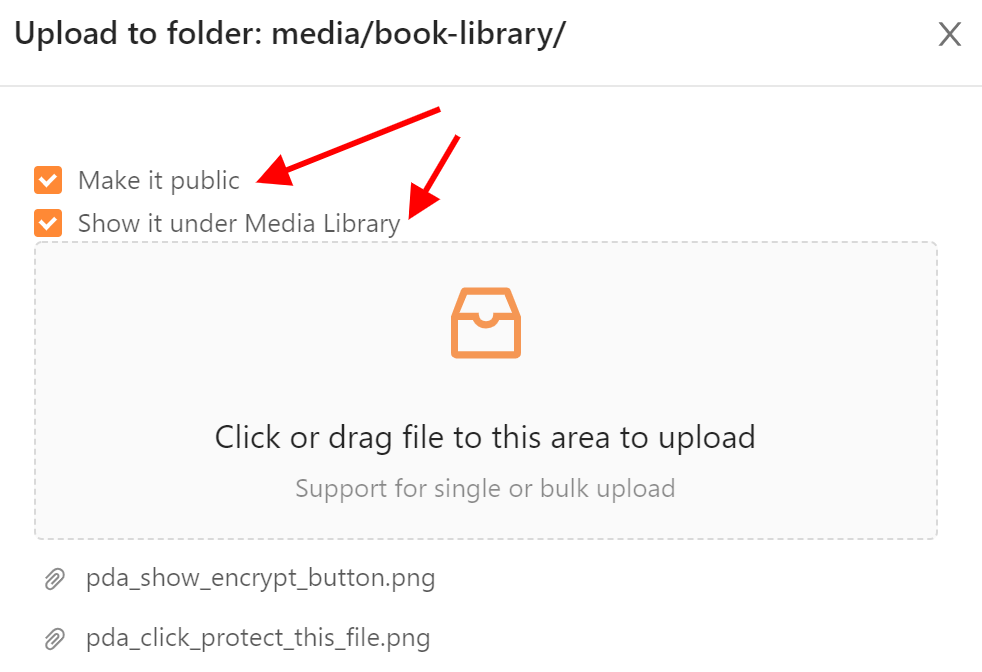
Add uploaded file to Media Library and/or make them public
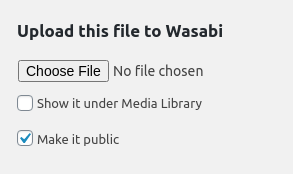
Offload files to Wasabi bucket
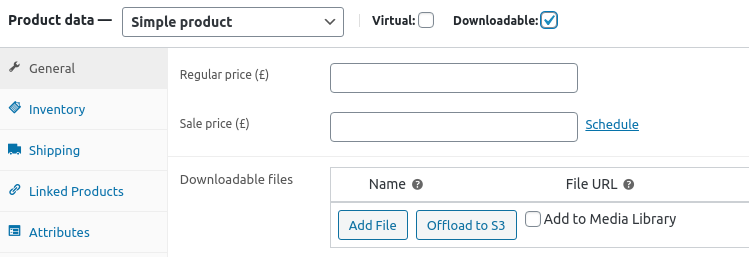
Offload files to S3/Wasabi bucket from WooCommerce product page
FAQ
Minimum requirements for our plugin to work are WordPress 4.9+ and PHP 5.6+
Once activated, go to our plugin’s settings page under Media >> Upload to S3 from your admin dashboard. First of all, you need to configure your S3 access keys in wp-config.php file. After that, reload the settings page and start uploading your files.
Looks like you haven’t enabled CORS on your S3 bucket yet. Please follow this guide on how to do so.
Since version 1.2.0, you can permit other users to upload files to your bucket by define(‘SSU_CAPABILITY’, ‘capability’) in your wp-config.php file. Feel free to replace ‘capability’ with any WordPress capability. The default value is “manage_options”, which means only admin and super admin can upload files.
Since version 1.2.0, if you define(‘SSU_FOLDER’, ‘your-bucket-folder’); in your wp-config.php file, our plugin only displays all files under this folder.
That means you can easily view your file uploads without having to browse through all the bucket directories.
There is still an option to display the entire directories under your bucket as usual.
Changelog
1.5.0
- [New Feature] Add suffixes to duplicate uploaded files
- [Improvement] Update default upload destination folder for files uploaded via Dokan dashboard
1.4.3
- [New Feature] Require SSU Pro plugin to upload more than 512MB per file
- [Improvement] Provide a shortcode attribute to customize upload form description
- [Improvement] Provide a hook to display S3 URL of uploaded files on front-end
- [BugFix] Add namespace to SSU for GuzzleHttp compatibility with other plugins using the same PHP library in AWS SDK
1.4.2
- [New Feature] Offload multiple files at once
- [Improvement] Improve Uploading pop-up and Panel UI
- [BugFix] Duplicate folder name in plugin directory listing
1.4.1
- [Improvement] Update shortcode information
- [Improvement] Reset file input in Admin
1.4.0
- [New Feature] Allow users to upload files on frontend
- [Improvement UI] Provide UI to select upload folder
- [Improvement] Use trailing slashes on destination directory
- [Improvement] Share filter to change upload folder
1.3.0
- [New Feature] Offload files from WooCommerce & Dokan product page
- [Improvement] Delete files on S3 bucket when their copies are deleted from Media Library
- [Improvement] Make files public from Media Library
- [BugFix] Fix PHP error notice with WordPress 5.5
- [BugFix] Handle file whose filename containing special characters
- [BugFix] Fix missing file size when adding image to Media Library
1.2.0
- [New Feature] Display S3 existing files under Media Library
- [New Feature] Grant other users permission to upload files
- [Improvement] Display upload directory only
1.1.0
- [New Feature] Integrate with Wasabi
- [Improvement] Generate signed URLs for files already on S3 bucket
- [Improvement] Update plugin labels & texts
1.0.0
- [New Feature] Allow users to configure their own bucket
- [New Feature] Display all files and folder under S3 bucket
- [New Feature] Enable users to copy files S3 URL
- [New Feature] Upgrade AWS-SDK library to 3.127.0