WooCommerce Manual Payment Plugin
Process payments from the WooCommerce Edit Order screen.
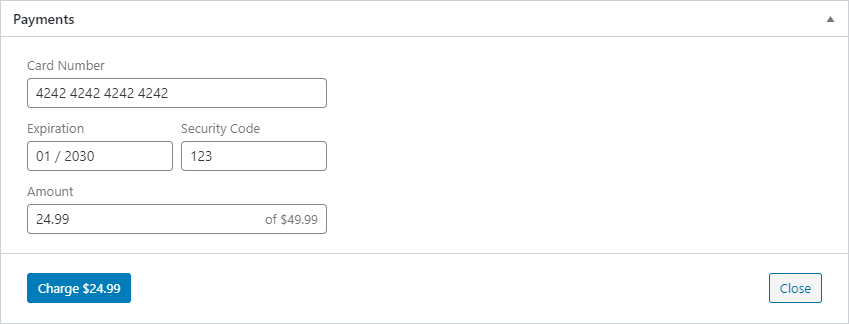
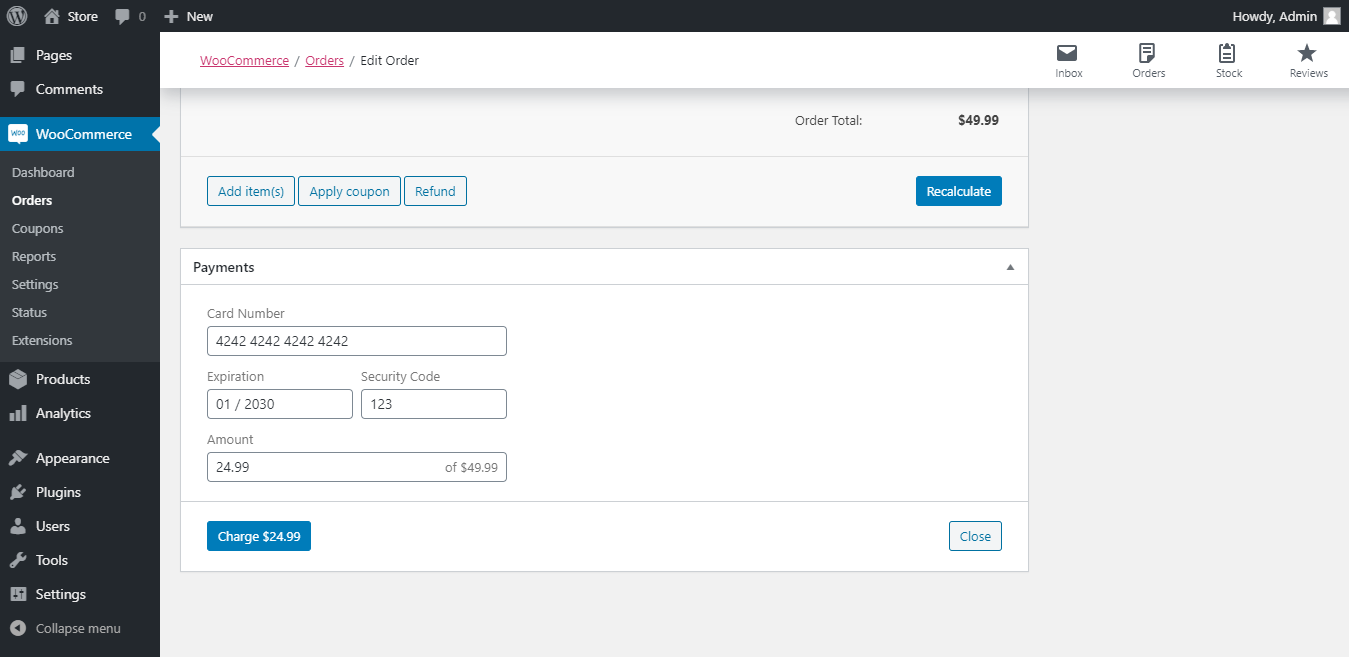
Charge credit and debit cards directly from the WooCommerce Edit Order screen. Perfect for taking phone orders without leaving your WordPress Admin.
Features
- Partial payments
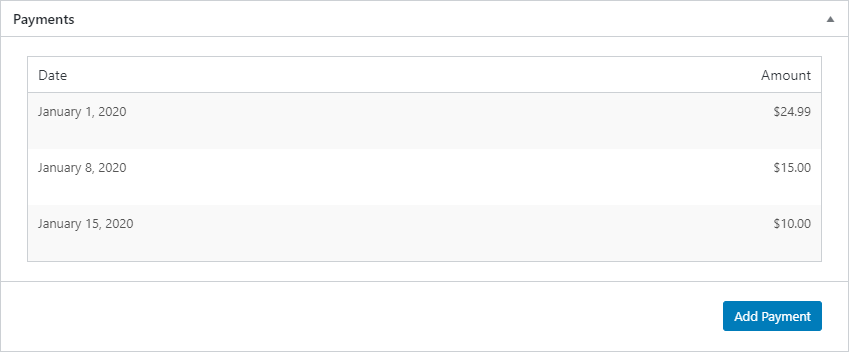
- Multiple payments per order
- Authorize charges without capturing
- Automatically update order status
- Automatically reduce stock
- MOTO exemption for SCA with Stripe
Payment Gateways
- Stripe
- Authorize.net
- Eway
Installation
Scroll down for configuration instructions.
Requirements
- WordPress 4.7+
- WooCommerce 3.3+
- PHP 5.6+
- An SSL certificate (not needed for Eway)
- Curl (only needed for Eway)
If you’re not sure whether your website is compatible, please contact your website administrator, web developer, or hosting provider. You can also post your question in the support forum.
Installation
You can find standard instructions for installing a plugin here. Once that’s done, you can move on to the Configuration section below.
Configuration
To get started, you’ll want to select a payment gateway and enter some API keys.
Stripe
- Follow these instructions to find your API keys:
- If you already use a Stripe payment gateway:
- Go to WooCommerce > Settings > Payments (Formerly Checkout) > Stripe.
- Here you can find your API keys.
- If you do not already use a Stripe payment gateway:
- If you already use a Stripe payment gateway:
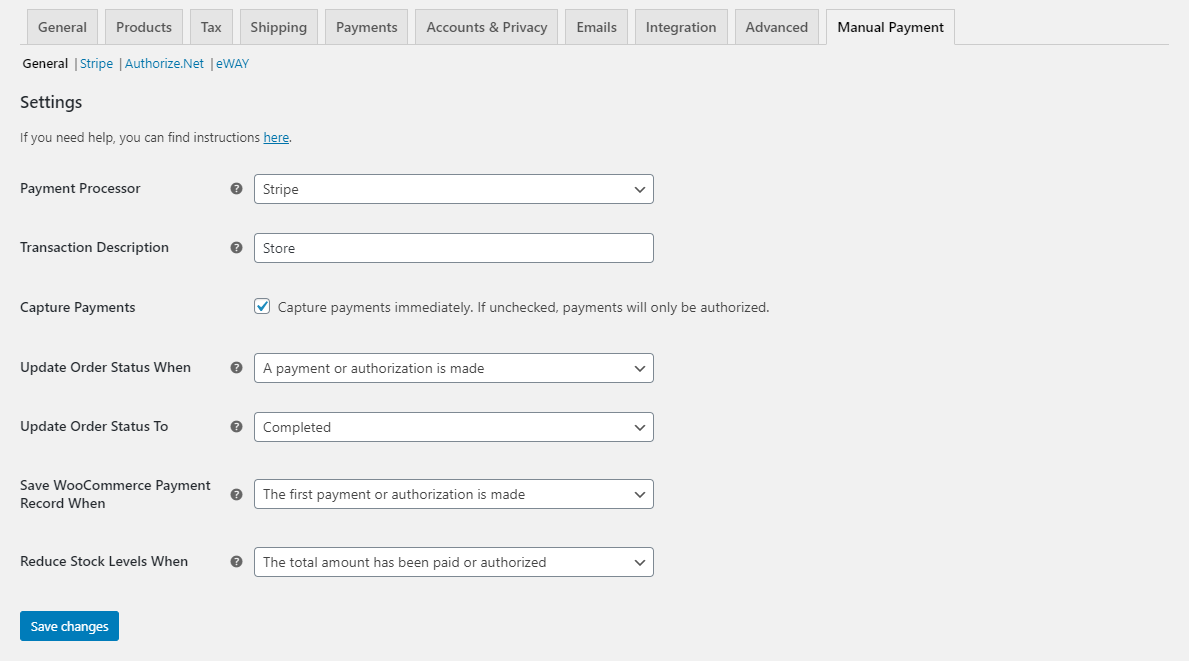
- From your WordPress dashboard, go to WooCommerce > Settings > Manual Payment.
- Select Stripe from the Payment Gateway drop-down and click Save changes.
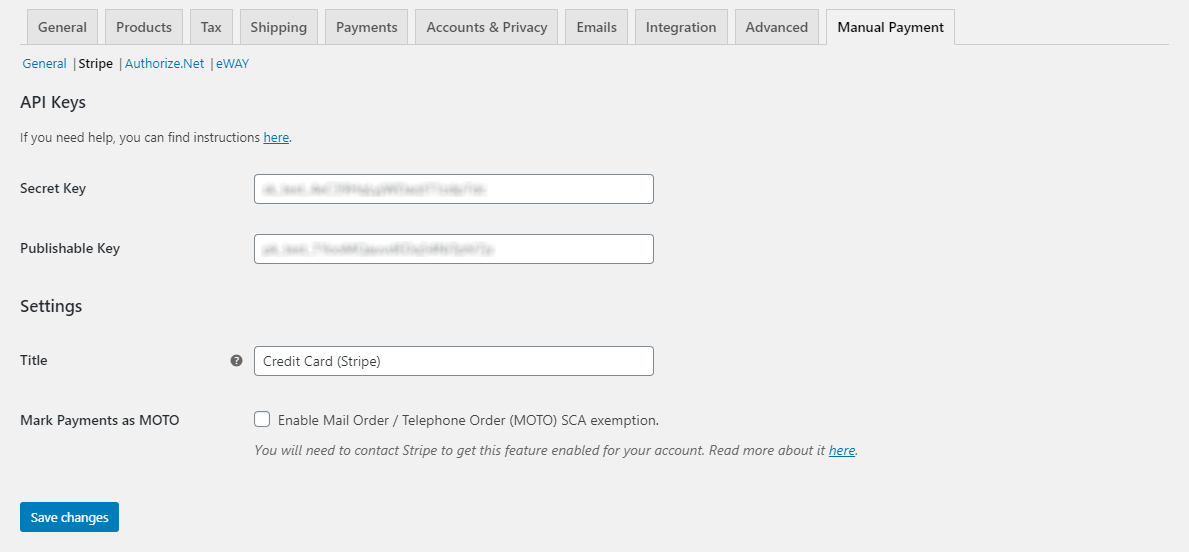
- Go to WooCommerce > Settings > Manual Payment > Stripe.
- Copy and paste your Secret key or Restricted key (from step 1) into the Secret Key field.
- Copy and paste your Publishable key (from step 1) into the Publishable Key field.
- Click Save changes. That’s it, you’re all set.
Authorize.net
- Follow these instructions to find your API keys:
- If you already use an Authorize.net payment gateway:
- Go to WooCommerce > Settings > Payments (Formerly Checkout) > Authorize.net.
- Here you can find your API keys.
- If you do not already use an Authorize.net payment gateway:
- If you already use an Authorize.net payment gateway:
- Follow these instructions to find your Public Client Key:
- Click the links that apply to you:
- For live accounts:
- Log in to the Authorize.net Merchant Interface.
- Visit this page.
- For sandbox accounts:
- Log in to the Authorize.net Merchant Interface.
- Visit this page.
- For live accounts:
- If you already have a Public Client Key on the page, you can skip this step. In the Create New Public Client Key section, click Submit and verify your identity.
- Click the links that apply to you:
- From your WordPress dashboard, go to WooCommerce > Settings > Manual Payment.
- Select Authorize.net from the Payment Gateway drop-down and click Save changes.
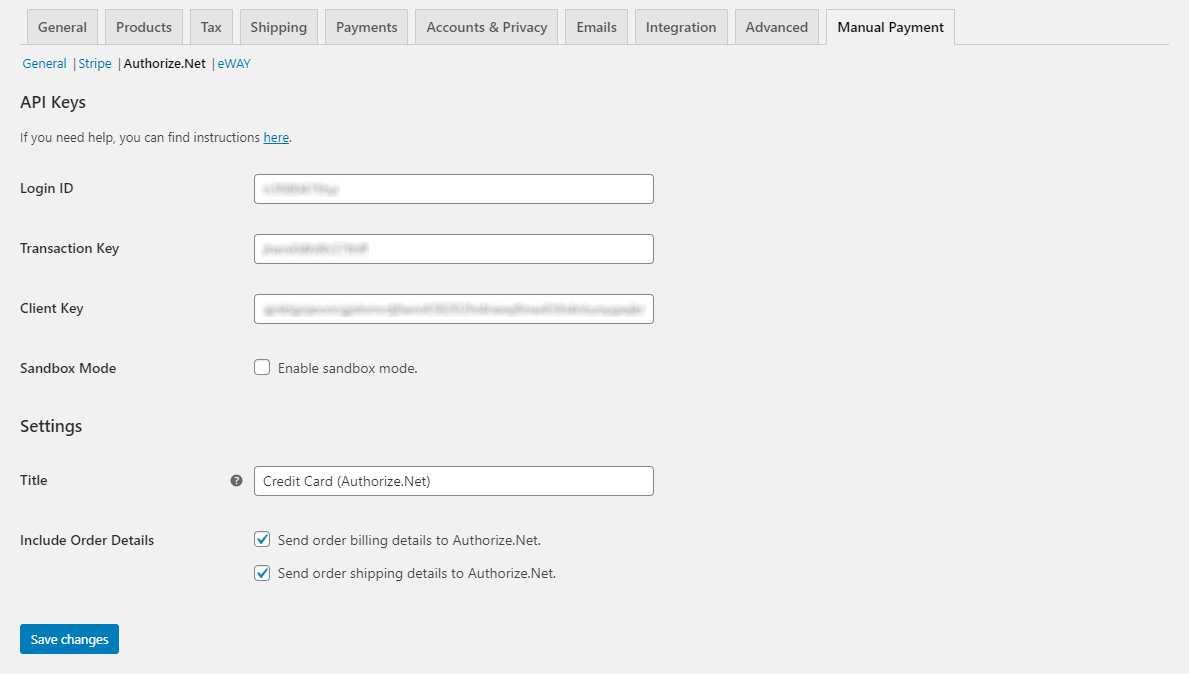
- Go to WooCommerce > Settings > Manual Payment > Authorize.net.
- Copy and paste your API Login ID (from step 1) into the Login ID field.
- Copy and paste your Transaction Key (from step 1) into the Transaction Key field.
- Copy and paste your Public Client Key (from step 2) into the Client Key field.
- Click Save changes. That’s it, you’re all set.
Eway
- Follow these instructions to find your API keys:
- If you already use an Eway payment gateway:
- Go to WooCommerce > Settings > Payments (Formerly Checkout) > Eway.
- Here you can find your API keys.
- If you do not already use an Eway payment gateway:
- If you already use an Eway payment gateway:
- From your WordPress dashboard, go to WooCommerce > Settings > Manual Payment.
- Select Eway from the Payment Gateway drop-down and click Save changes.
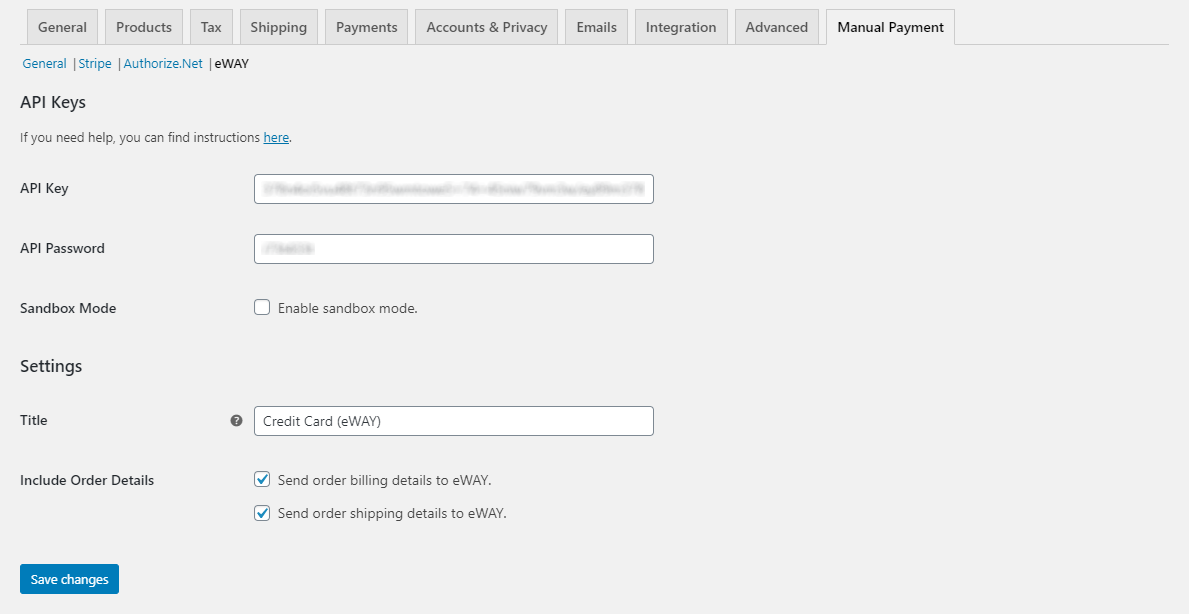
- Go to WooCommerce > Settings > Manual Payment > Eway.
- Copy and paste your API Key (from step 1) into the API Key field.
- Copy and paste your API Password (from step 1) into the API Password field.
- Click Save changes. That’s it, you’re all set.
Screenshots
Changelog
2.8.4
- Declare support for WordPress 6.6.
- Declare support for WooCommerce 9.x.
- Update the Stripe API version.
2.8.3
- Fix a fatal error that some users have been getting (
Class "WC_Settings_Page" not found).
2.8.2
- Declare support for WordPress 6.5.
2.8.1
- Declare support for WordPress 6.4.
- Update the Stripe API version.
2.8.0
- Declare support for WordPress 6.3.
- Declare support for all backward-compatible WooCommerce 8.x releases.
- Update the minimum required WooCommerce version to 3.3.0.
- Add support for WooCommerce High-Performance Order Storage (HPOS).
2.7.0
- Declare support for WordPress 6.2.
- Add a
woo_mp_should_loadfilter to determine whether the plugin should load. Loading the plugin outside of the WP Admin is not recommended. - Add a
woo_mp_payments_meta_box_template_directoriesfilter to enable the use of custom templates. If you use this filter, you will need to test each release before updating your production site. - Add a
woo_mp_stripe_request_headersfilter to allow customizing the Stripe API request headers. - Only output errors for users who can process payments.
- Update the Stripe API version.
2.6.12
- Declare support for WordPress 6.1.
- Declare support for all backward-compatible WooCommerce 7.x releases.
- Update the Stripe API version.
- Update the Eway SDK.
- Update Authorize.net response code details.
- Rename “Authorize.Net” to “Authorize.net”.
2.6.11
- Declare support for WordPress 6.0.
2.6.10
- Declare support for WordPress 5.9.
2.6.9
- Declare support for all backward-compatible WooCommerce 6.x releases.
- Send shipping phone number to Eway on WooCommerce versions 5.6 and above.
2.6.8
- Declare support for WordPress 5.8.
- Change “eWAY” to “Eway” to reflect the brand refresh.
2.6.7
- Fix a bug which is present only in WooCommerce 5.4.0. The bug prevents payments from being processed due to a faulty change to the jQuery.payment library.
- Remove uses of deprecated jQuery methods to prevent jQuery Migrate warnings.
2.6.6
- Declare support for WordPress 5.7.
- Update color palette to match the changes introduced in WordPress 5.7.
2.6.5
- Declare support for all backward-compatible WooCommerce 5.x releases.
2.6.4
- Declare support for WordPress 5.6.
- Ensure compatibility with PHP 8.0.
- Update Stripe settings and configuration instructions to account for new Stripe features.
- Update the Stripe API version.
2.6.3
- Declare support for WordPress 5.5.
2.6.2
- Declare support for all backward-compatible WooCommerce 4.x releases. See here and here for more information.
- Improve notice design.
- Make a distinction between “invalid” and “incorrect” in error messages. For example, entering a 4-digit security code for a Visa card would be “invalid”, but entering the wrong 3-digit security code would only be “incorrect”.
- Improve presentation of Authorize.net error details.
- Fix inaccurate error when attempting to charge an expired card with Authorize.net.
2.6.1
- Declare support for WooCommerce 4.2.
- Improve the consistency of terminology used throughout the plugin and documentation.
- Minor design improvements.
- Increase the Authorize.net request timeout to 45 seconds.
2.6.0
- Declare support for WooCommerce 4.1.
- Update the minimum required WordPress version to 4.7.0.
- Update the minimum required WooCommerce version to 3.0.0.
- Send customer ID and email address to Authorize.net. You can learn how to configure email receipts here.
- Improve the formatting of the addresses sent to Authorize.net.
- Update the Stripe API version.
2.5.1
- Declare support for WordPress 5.4.
- Declare support for WooCommerce 4.0.
2.5.0
- Declare support for WooCommerce 3.9.
- Update the minimum required PHP version to 5.6.0.
- Remove the setting to prevent sending customer names and email addresses to Stripe. You can still use the
woo_mp_stripe_charge_requestfilter to get the same effect. - Remove the setting to prevent sending order line item details to Authorize.net. You can still use the
woo_mp_authorize_net_charge_requestfilter to get the same effect. - Only allow users with the
edit_shop_orderscapability to process payments. - Minor design tweaks and fixes.
- Fix floating point comparison bugs.
- Fix syntax error on PHP versions below 5.4 when checking plugin requirements.
- Correct the help tip for the Transaction Description setting.
- Update the Authorize.net configuration instructions to match updates to the Merchant Interface.
- Update the Stripe API version.
- Update Authorize.net response code details.
2.4.1
- Declare support for WordPress 5.3.
- Declare support for WooCommerce 3.8.
- Update form controls to match the new style in WordPress 5.3.
- Provide instructions on how to proceed when encountering SCA errors with Stripe.
- Update the Stripe API version.
2.4.0
- Add a new Mark Payments as MOTO setting for Stripe which will allow you to make use of the Mail Order / Telephone Order (MOTO) SCA exemption. You will need to contact Stripe to get this feature enabled for your account.
- Switch from the official Stripe SDK to a custom solution. This will allow us to use new Stripe APIs without having a dependency on newer versions of the SDK. When depending on certain versions of the SDK, there is the potential for conflicts with other plugins that are using different versions.
2.3.0
- Declare support for WooCommerce 3.7.
- Simplify the charge amount suggestions.
- Add support for the WooCommerce Admin plugin.
- Add a warning about unsaved order changes.
- Simplify the order note that gets added when a payment is processed.
- Add XSS protection.
- Update Authorize.net response code details.
- Update one of the Authorize.net authentication errors to indicate that it can also mean that the Sandbox Mode is incorrectly set.
- Remove number spinners from all money fields.
- Update the Stripe SDK.
- Update the Stripe API version.
2.2.0
- Declare support for WordPress 5.2.
- Declare support for WooCommerce 3.6.
- Allow the welcome notice to be permanently dismissed.
- Fix bug where the amount displayed on the charge button is incorrect when the WooCommerce decimal separator setting is set to anything other than a dot.
- Update the Stripe SDK.
- Update the Stripe API version.
2.1.0
- Add
woo_mp_payment_completeaction hook. - Update the Stripe SDK.
- Update the Stripe API version.
- Update Authorize.net response code details.
- Fix PHP notice triggered by certain Authorize.net errors.
- Tweak the wording of certain authentication error messages.
2.0.0
- Add payments table. You can now view all the payments for an order in a structured format.
- Redesign.
- Declare support for WordPress 5.0.
1.15.0
- Add a welcome notice to help new users get started.
- Improve configuration instructions.
- Minor setting tweaks.
- Add
woo_mp_{$payment_gateway_id}_charge_requestfilters. This provides the ability to customize the data sent to the payment gateway when processing a payment. - Specify which Stripe API version the plugin uses to avoid incompatibilities with accounts that are using older versions of the API.
1.14.0
- Declare support for WooCommerce 3.5.
- Add support for multisite.
- Add support for renaming the plugin directory and the main plugin file.
- Display PHP and JavaScript errors encountered while processing payments.
- Add CSRF protection.
- Don’t deactivate the plugin when a system requirement is not met.
- Update the Stripe SDK to the latest version.
1.13.0
- Automatically reduce order item stock levels after a payment. There is now a setting to control this feature.
- Add charge amount autocomplete suggestions. The amount field now contains a button which will open a menu allowing you to easily populate the field with either the order total or the amount of the order total that has not been paid yet (if applicable). You can also open this menu by pressing the up/down arrow keys while the field is focused.
1.12.3
- Support WooCommerce 3.4.
1.12.2
- Fix payments not working for auto-draft orders on WooCommerce 3.x with the “Update Order Status When” option enabled.
- Fix payments not working for auto-draft orders on WooCommerce 2.6 with Stripe.
- Display errors thrown by the Stripe.js library.
1.12.1
- Fix autoloader so it doesn’t try to load symbols from other plugins.
1.12.0
- Add Eway gateway.
- Add support for multi-currency stores.
- The order note that is added when a payment is made will now indicate which user processed the payment.
- Scroll the page to the top after processing a payment. This makes the success notice and order note immediately visible.
- Fix bug where processing a payment on the Add new order page would cause another new order to be created.
- Improve a few Stripe errors.
1.11.2
- Improve settings organization.
- Do more field validation before passing off requests to payment gateways. This results in faster errors for invalid field values.
- Fix JS error which would occur when certain types of Authorize.net errors were encountered.
- Minor design tweaks.
1.11.1
- Fix bug where charge panel would freeze instead of displaying certain errors.
- Use a more reliable technique to determine if a charge made with Authorize.net has been held for review.
1.11.0
- Send “Taxable” field to Authorize.net for “Itemized Order Information”.
- Implement the Authorize.net “Itemized Order Information” feature for WooCommerce 2.6.
- When sending “Itemized Order Information” to Authorize.net, use the “Item Name” from the line item itself, not the associated product.
- Fix bug where sending “Itemized Order Information” to Authorize.net would result in an error if any of the associated products had been deleted.
- Remove HTML tags and shortcodes from line item descriptions before sending them to Authorize.net.
- Trim billing and shipping information before sending it to Authorize.net. This will prevent errors from occuring when the values being sent are too long.
- Improve Authorize.net errors.
- Update the Stripe SDK to the latest version.
- Remove unnecessary files from the Stripe SDK.
- Fix PHP notice and unnecessary icon on the Plugins page when an update is available and there is no upgrade notice.
- The success message and order note will now indicate when a payment is held for review.
- Utilize the core WordPress notice design for charge error messages.
1.10.1
- Patch bug where attempting to send order item details to Authorize.net on WooCommerce 2.6 results in an error.
- Fix bug where sending an order item that doesn’t have a price to Authorize.net would result in an error.
1.10.0
- Add payment method title option for all gateways.
- Symlinking the plugin directory is now fully supported.
1.9.0
- Allow any status to be set for the “Update Order Status To” option. This means that you can now choose a status that has been added by a plugin.
- Refresh the page after a successful transaction. This makes it impossible to accidentally overwrite changes made to the order in the background.
- Populate the Authorize.net “Invoice Number” field with order numbers instead of order IDs. These are usually the same, however there are plugins that allow the order number to be customized. These plugins are now supported. Stripe already supports this.
- Prevent direct access to plugin files.
- Add plugin requirements verification.
1.8.1
- Add WooCommerce version check support. This will confirm compatibility with version 3.3.
- Bump minimum required PHP version to 5.5.
1.8.0
- Add official WooCommerce payment records to orders. There is now a setting to control when an official payment record is saved.
1.7.1
- Mobile design improvements.
- Tested with WordPress 4.9.
1.7.0
- Added the ability to send level 2 data to Authorize.net.
- Design improvements.
1.6.2
- Add handling for Authorize.net transaction detail character limits.
1.6.1
- Fix Authorize.net error when order contains product with no SKU.
1.6.0
- Add option to send billing details to Authorize.net.
- Add option to send item details to Authorize.net.
- Tested with WordPress 4.8.
- Update help links to go directly to installation section.
- Improve error handling.
1.5.0
- Add option to send customer name and email to Stripe.
- Add option to send shipping details to Authorize.net.
- Add option to update order status when chosen condition is met.
- Send order number to payment gateway.
- Improve error messages.
- Add charge amount to Charge button.
- Add support for Stripe zero-decimal currencies.
- Change success message for authorizations.
- Remove curl dependency.
- Fix charge amount formatting.
1.4.1
- Make “Capture Payment” on by default.
1.4.0
- Add “Capture Payment” option.
- Fix Authorize.net bug.
- Small design improvement on the settings page.
1.3.4
- Fix plugin conflict.
1.3.3
- Update help links.
1.3.2
- Fix bug: If there was a problem with the setup of the plugin, the “Screen Options” and “Help” buttons at the top of the Edit Order page did not work.
- Make it clear when there is no payment gateway selected. Previously it would show “Stripe” because it was the first option. This could make the user think that a payment gateway was already selected. Now it shows “Select a payment processor…”.
1.3.1
- Patch faulty setting.
- Fix typos.
- Add handling for incorrect API keys.
- Fix PHP notice.
1.3.0
- Add transaction description setting.
- Switch from curl to WP functions for Authorize.net. Curl is no longer a requirement for Authorize.net.
- Fix small design issue with loading animation on Edge.
- Fix small design issue with tabs.
- Fix some setup bugs.
- Update Stripe SDK to latest version.
1.2.0
- Added ability to process multiple payments without refreshing the page.
- Added help link to settings page and initial setup instructions.
- Improved user-friendliness of error messages.
- Minor design changes and assorted tweaks.
- Added compatibility check.
- Update readme.
1.1.0
- Added amount field to charge form.
- Code improvements.
1.0.0
- Initial release.
