
Visual Sitemap Plugin
Display an interactive visual sitemap of pages, tags, and categories in admin.
Displays an interactive visual sitemap in admin. A nice touch for sites delivered to clients, and useful for managing a site as it gives a visual overview of all pages, tags, and categories.
Installation
Minimum Requirements
- WordPress 3.0 or greater
- PHP version 5.2.4 or greater
- MySQL version 5.0 or greater
Automatic Installation
Automatic installation is the easiest option as WordPress handles the file transfers itself and you don’t even need to leave your web browser. To do an automatic install of Visual Sitemap, log in to your WordPress admin panel, navigate to the Plugins menu and click Add New.
In the search field type “Visual Sitemap” and click Search Plugins. Once you’ve found the plugin you can view details about it such as the point release, rating and description. Most importantly of course, you can install it by simply clicking Install Now. After clicking that link you will be asked if you’re sure you want to install the plugin. Click yes and WordPress will automatically complete the installation.
Manual Installation
The manual installation method involves downloading the plugin and uploading it to your webserver via your favorite FTP application.
- Download the plugin file to your computer and unzip it
- Using an FTP program, or your hosting control panel, upload the unzipped plugin folder to your WordPress installation’s wp-content/plugins/ directory.
- Activate the plugin from the Plugins menu within the WordPress admin.
Upgrading
Automatic updates should work like a charm; as always though, ensure you backup your site just in case.
Screenshots
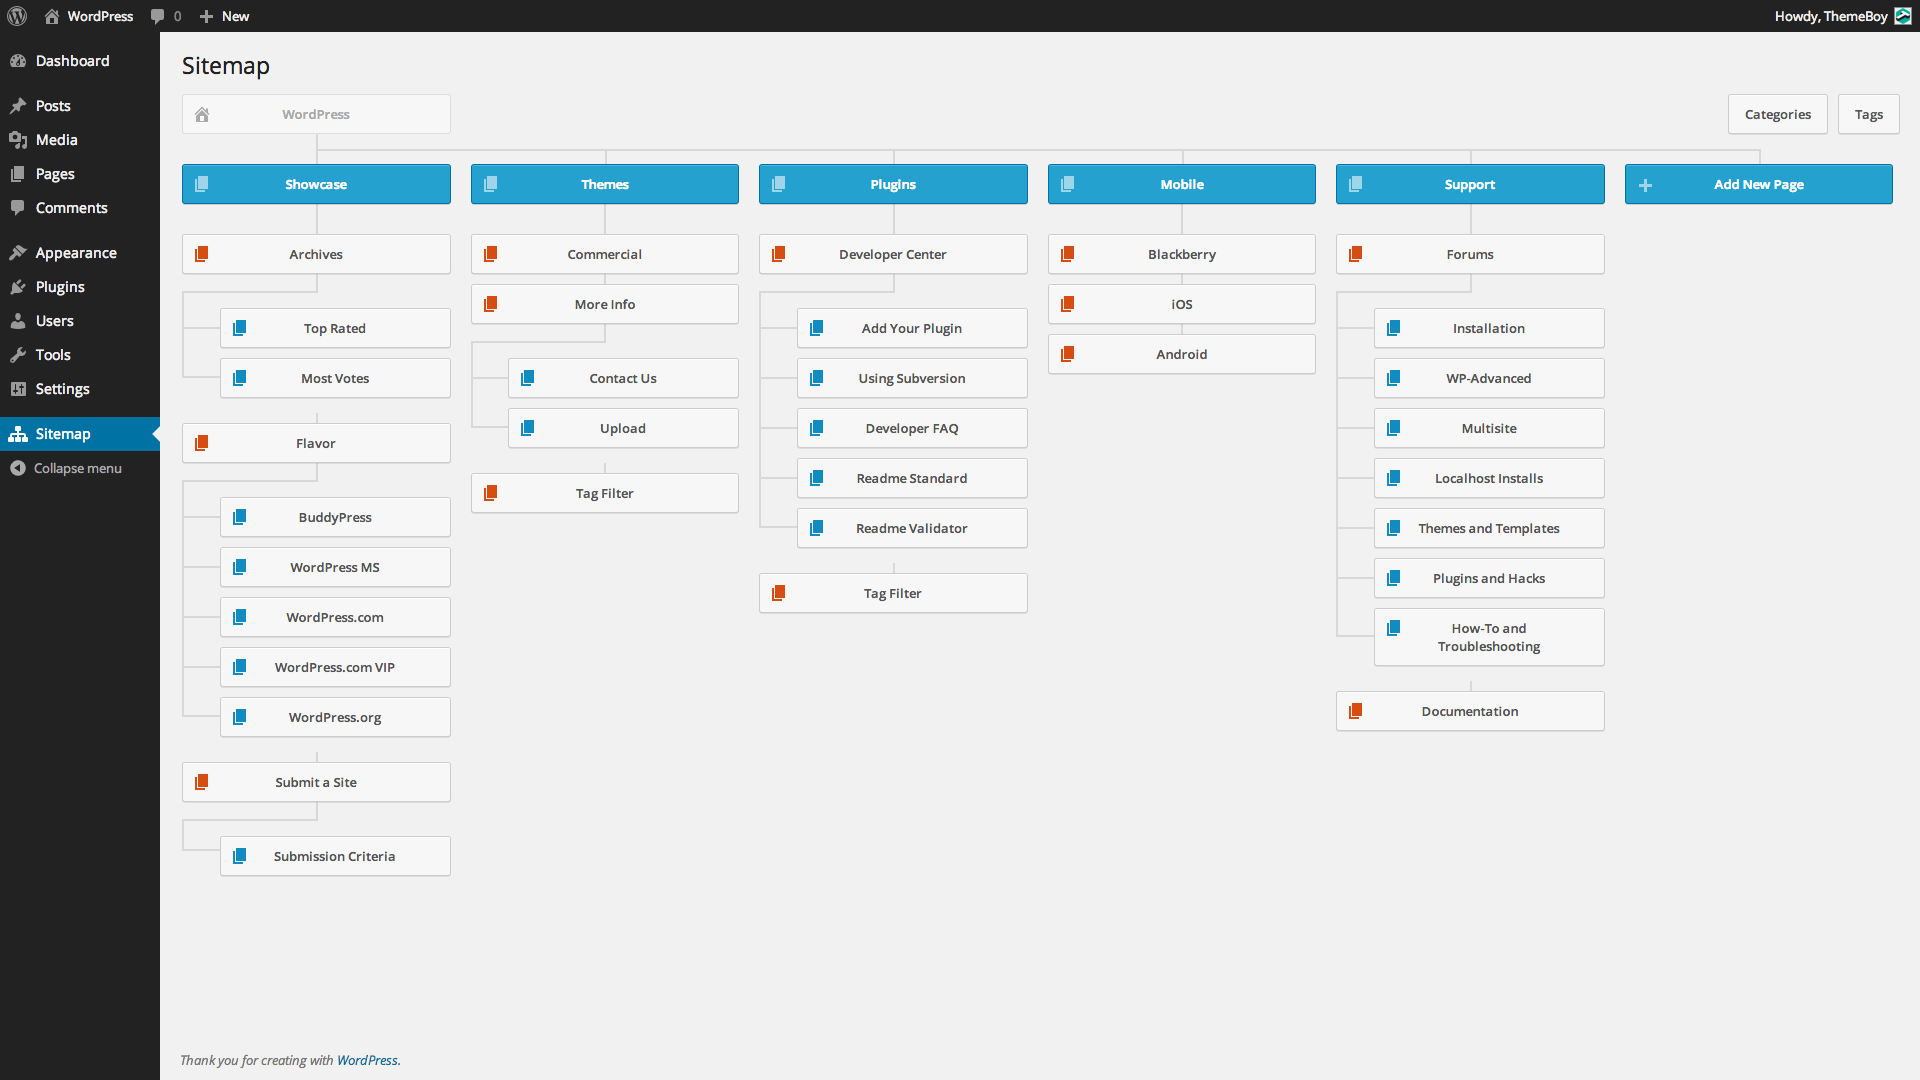
Visual sitemap page in admin.
FAQ
Installation Instructions
Minimum Requirements
- WordPress 3.0 or greater
- PHP version 5.2.4 or greater
- MySQL version 5.0 or greater
Automatic Installation
Automatic installation is the easiest option as WordPress handles the file transfers itself and you don’t even need to leave your web browser. To do an automatic install of Visual Sitemap, log in to your WordPress admin panel, navigate to the Plugins menu and click Add New.
In the search field type “Visual Sitemap” and click Search Plugins. Once you’ve found the plugin you can view details about it such as the point release, rating and description. Most importantly of course, you can install it by simply clicking Install Now. After clicking that link you will be asked if you’re sure you want to install the plugin. Click yes and WordPress will automatically complete the installation.
Manual Installation
The manual installation method involves downloading the plugin and uploading it to your webserver via your favorite FTP application.
- Download the plugin file to your computer and unzip it
- Using an FTP program, or your hosting control panel, upload the unzipped plugin folder to your WordPress installation’s wp-content/plugins/ directory.
- Activate the plugin from the Plugins menu within the WordPress admin.
Upgrading
Automatic updates should work like a charm; as always though, ensure you backup your site just in case.
Changelog
0.9
- Beta release.