NFT Maker Plugin
DEPRECATED / NOT MAINTAINED: Please be aware that we have stopped the development of this WordPress plugin and recommend to use our API or SDK directl …
DEPRECATED / NOT MAINTAINED: Please be aware that we have stopped the development of this WordPress plugin and recommend to use our API or SDK directly. Visit Tatum.
If you want to sell NFTs but don’t want to build an entire NFT marketplace from scratch, then NFT Maker is the plugin you’ve been waiting for. Lazy Minting. WordPress integration. Free IPFS Storage, forever.
NFT Maker supports the following blockchains:
Ethereum
Polygon
Binance Smart Chain
Celo
Harmony
NFT Maker allows you to turn your Woocommerce store into an NFT store with a simple plugin. Just install, follow your usual WordPress product publishing flow, and tick which blockchain you’d like to mint your NFTs on. It’s so easy, you’ll be up and running in no time!
Lazy Minting
Put simply, lazy minting is when an NFT is available off the blockchain and only gets minted when someone buys it. This means that you, the seller, don’t have to pay any upfront gas fees to mint your NFTs. Gas fees are only paid once the NFT is purchased and then minted on the blockchain.
Free IPFS Storage, forever.
With native IPFS integration, you can store your images, videos, audio files, or whatever other metadata you’d like to include in your NFT at no cost whatsoever. Like the NFTs themselves, files stored on IPFS cannot be tampered with or changed, so your NFT will always be connected to their original metadata, forever.
NFT Maker Tutorial
Check out our full video tutorial on how to get started..
Here’s it works:
1. Install the plugin.
2. Sign up for a Tatum API key. The Tatum is an external service which provides access for the blockchain infrastructure. The credits from your plan are used to pay for the gas fees to mint NFTs. You can try NFT Maker with Test API keys for free, but NFT minted with Test API keys will not have any value, because they are minted on Testnet network.
3. Create your NFT by uploading an image. This won’t consume any credits until someone buys it.
4. When someone buys your NFT, the metadata is uploaded to IPFS, and the NFT is minted to the blockchain address provided by the customer at checkout.
5. Credits to pay the gas fees for minting are deducted from your Tatum plan.
IMPORTANT NOTICE
NFT Maker works with the both free and paid Tatum plans. You can try NFT Maker with Test API keys for free, but NFTs minted with Test API keys will not have any value, because they are minted on Testnet network.
The paid Tatum API key plan works with blockchain Mainnet networks, and it pays for the gas fees to mint your NFTs from your Tatum API key plan.
Please note, you can cancel your plan at any time, but Tatum DOES NOT offer refunds for received payments.
Due to high ETH fees, minting NFTs with ETH is available only with enterprise API keys.
If you want to know which smart contracts are used for minting NFTs you can find them inside the admin section of the NFT Maker plugin in the help section.
You are welcome to add your pull request to our Github repository. If you have any questions just drop us a line on the Tatum Discord.
Or feel free to contact developer via Telegram.
Installation
This section describes how to install the Tatum plugin and get it working.
- Download and install the Woocommerce plugin if you haven’t already.
- Click “Get your Tatum API key.”
- Login to the Tatum dashboard and purchase a paid plan. The Tatum is an external service which provides access for the blockchain infrastructure.
- When you have completed your purchase, you will be directed back to the Tatum dashboard. Next to your newly created API key, click “Show” and copy your API key.
- Now, back in the NFT Maker dashboard, paste your API key in the field labeled “Paste your API key below.”
- Okay, you’re all ready to mint NFT tokens! In the overview, you can see info about your API key.
- Open the “Product” tab in the left-hand column of your WordPress dashboard.
- Click “Add product.”
- Name your NFT.
- Set its price in the “General” tab of the “Product data” box.
- In the “NFT Maker” tab of the same box, select the blockchain on which to mint the NFT upon purchase.
- Upload an image by clicking “Set product image” in the “Product Image” field in the right-hand column of the screen.
- Click “Publish” to create your product. Now it is available for purchase in your e-shop. You can also view it in your list of lazy-minted NFTs. You will not consume any credits from your paid plan for gas fees until someone purchases your NFT and it is minted on the blockchain you have selected.
- When a buyer adds the NFT to their cart and proceeds to checkout, they will have to enter a blockchain address on the blockchain to which the NFT will be minted.
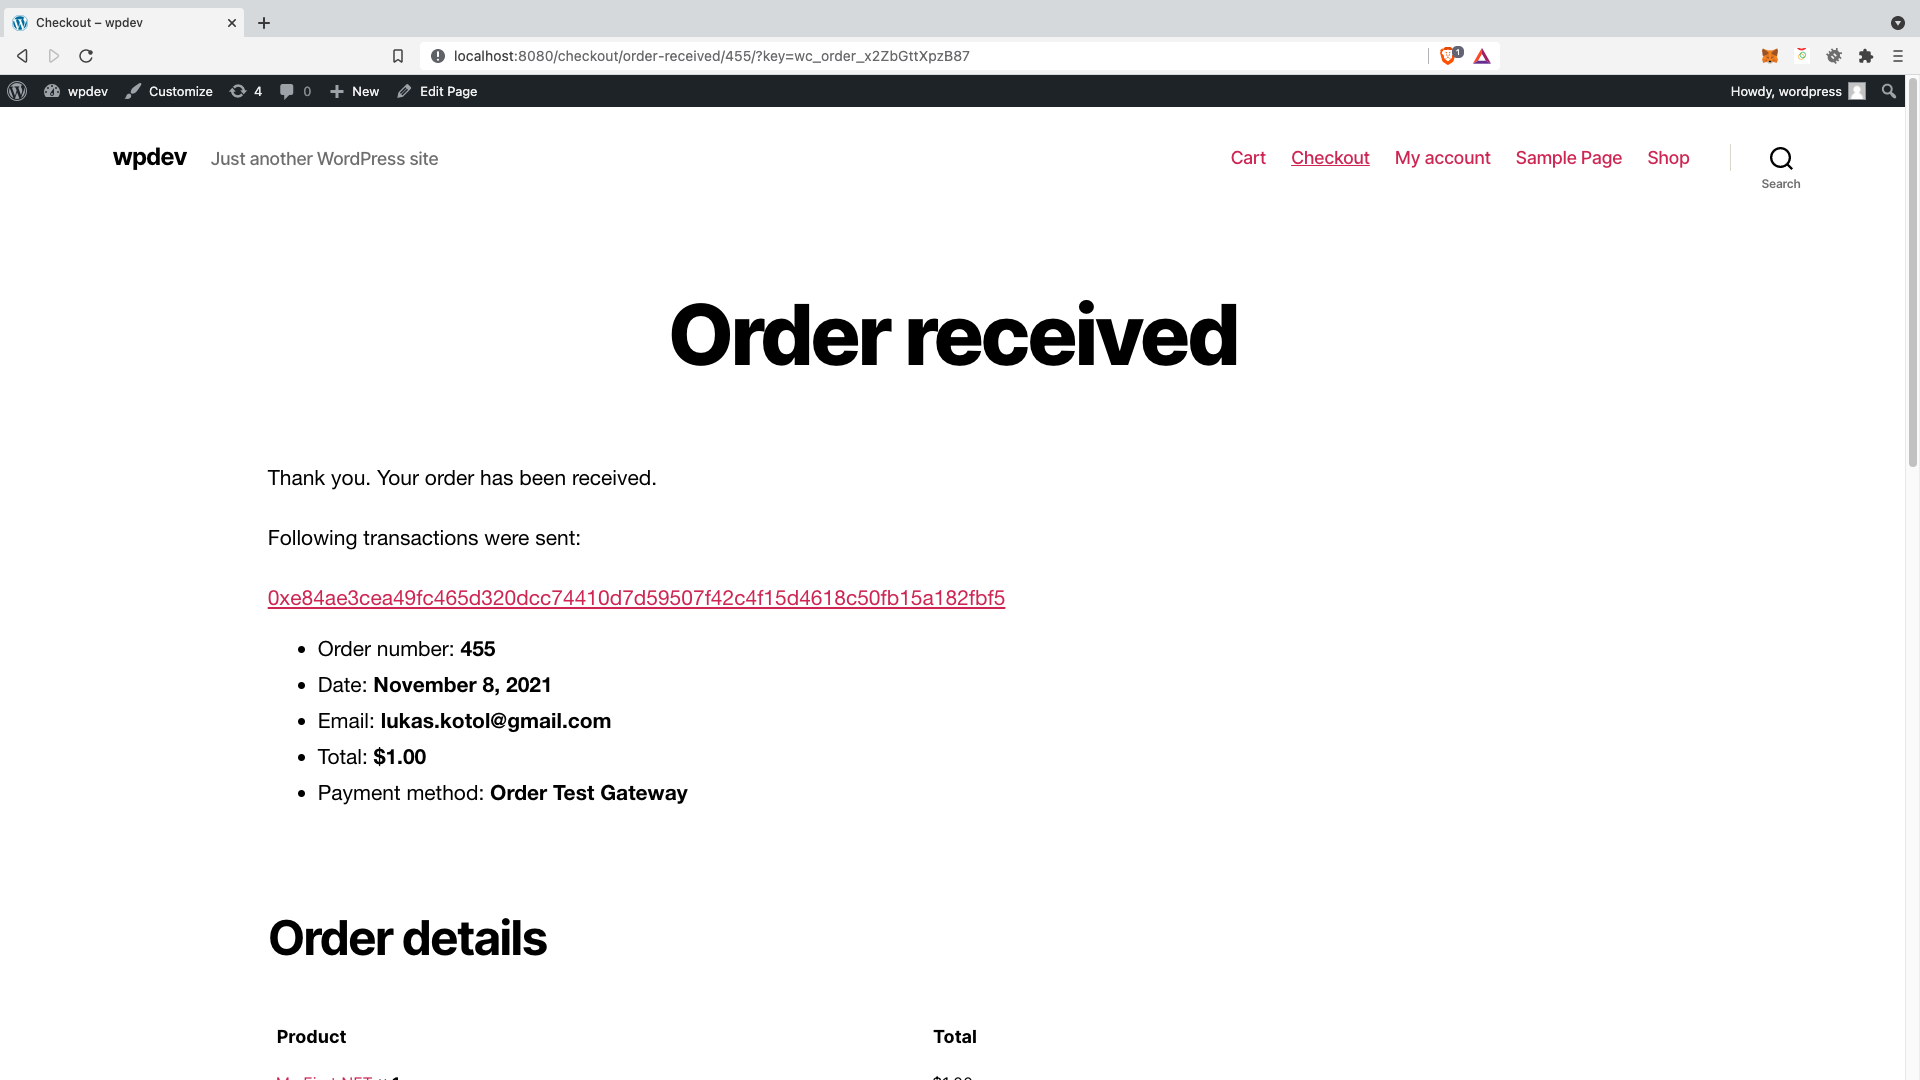
- After a successful purchase of the NFT, the customer will be shown a link to the blockchain transaction.
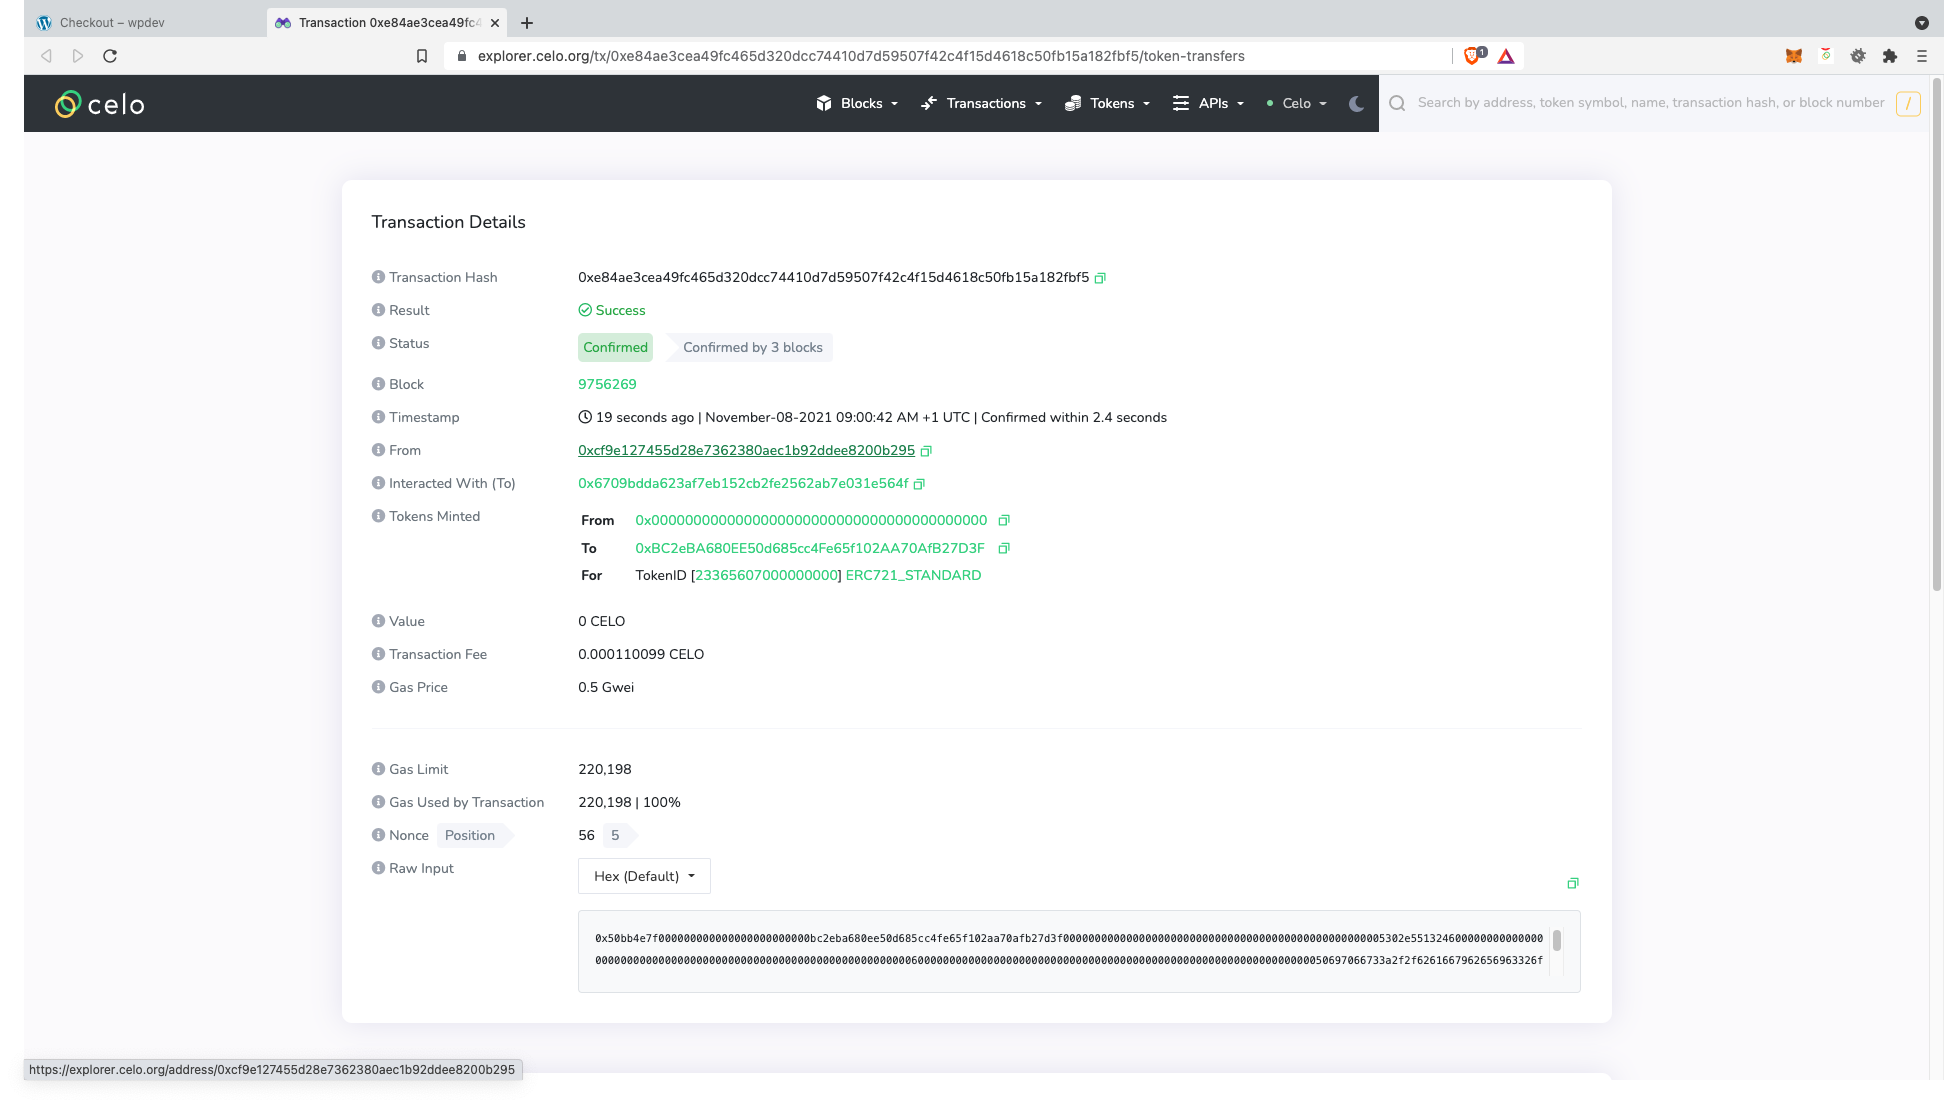
- The blockchain transaction link redirects the customer to the blockchain explorer of the respective blockchain where they can view NFT mint transaction details.
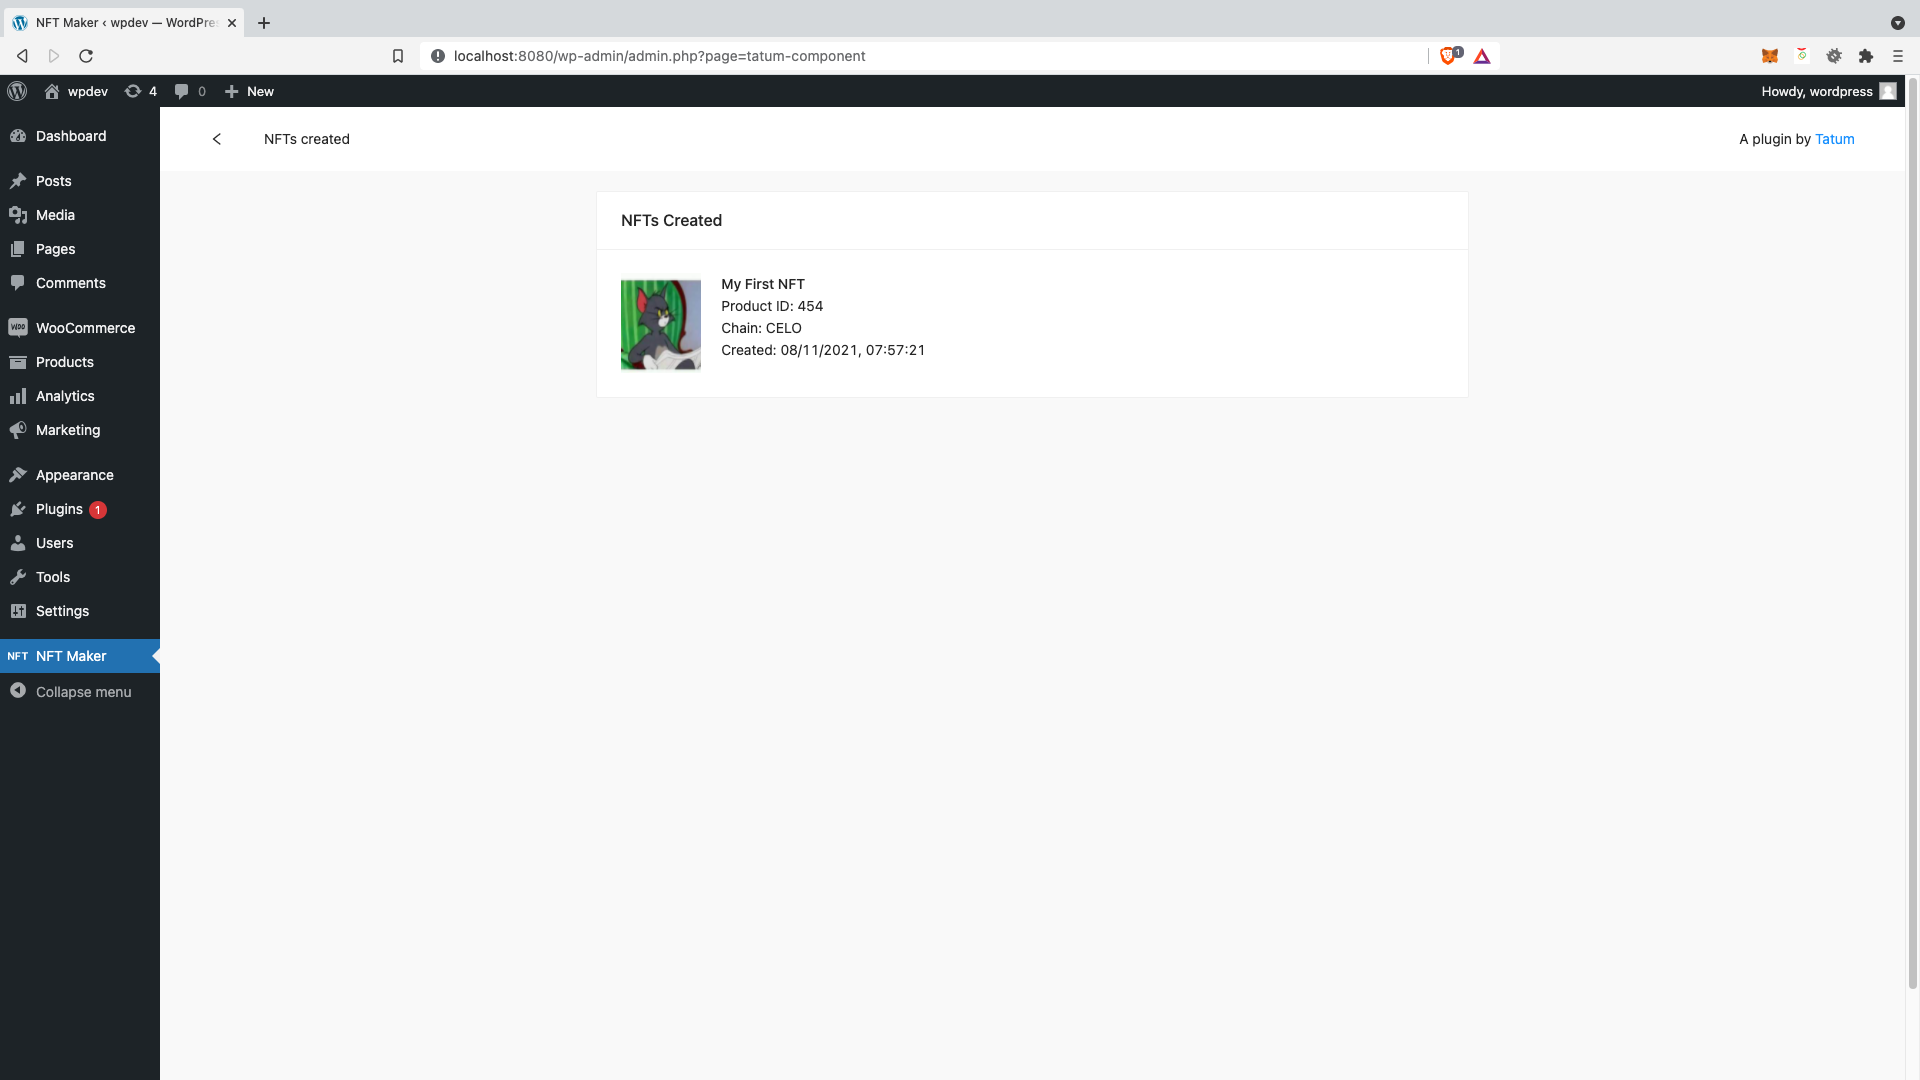
- Admins of the WordPress shop can also view all lazy-minted and sold NFTs.
Screenshots

Create an account in the Tatum Dashboard and obtain paid API key. The Tatum is an external service which provides access for the blockchain infrastructure.

Install Woocommerce plugin if you don't have already installed it yet.

Submit your API key.

You are ready to mint NFT tokens! In the overview, you can see info about your API key.

Create Woocommerce product. Don't forget to select chain on which NFT will be minted.

Don't forget to set an NFT image. Only images up to 50 MB are available for storing. If you don't set an image your NFT will not be minted!

After you create product can see it in the list of lazy minted NFTs.

If your customer adds product to the cart and proceed to checkout, he/she will need to submit blockchain address to which will be NFT minted.

After successful purchase of the NFT customer will see the blockchain transaction.

Blockchain transaction links can redirect customer to the blockchain explorer to see NFT mint transaction details.

Admin can also see all sold and minted NFT.
FAQ
Normally, to create NFTs on different blockchains, you would need to have access to blockchain nodes and create wallets on each blockchain.
With NFT Maker, you can simply use an API key to connect to different blockchains through Tatum, and everything else is taken care of for you.
Credits are used to pay for the gas fees on the blockchain on which you are minting NFTs. Each time you mint an NFT, credits are deducted from your monthly credit amount.
This depends on the current gas prices on each blockchain. In general, Harmony and Celo are very cheap, Polygon and BSC are somewhere in the middle, and Ethereum is extremely expensive.
No, your plan covers all fees.
No, you can only create and sell NFTs directly to your users with the plugin.
Yes, the file limit is 50MB.
No, it only supports standard ERC-721 NFTs.
Yes, the plugin is open source. You can download the source code here and modify anything you like.
No, the plugin cannot generate wallets, it just mints your NFTs to the addresses your users provide.
No, there would be no reason for this. They can simply provide the address of their wallet and the NFT will be minted to that address.
Ethereum, Polygon, Binance Smart Chain, Celo, Harmony
No, the name of the collection is in the smart contract on each blockchain and cannot be changed.
No, since NFTs are lazy-minted, you do not need to create wallets on any blockchain. Once an NFT is purchased, it is minted directly to the buyer’s blockchain address.
No, you can choose which NFT to mint on which blockchain when you are setting up each product.
You can select one blockchain per product, but you can also create multiple NFTs of the same image for multiple blockchains if you so choose.
Yes, the NFT Maker plugin itself is completely free. However, in order to pay for the gas fees necessary to mint NFTs, you must buy a paid plan in the Tatum Dashboard.
Each paid plan has different credit amounts, and credits will be consumed when your NFTs are purchased and minted to the blockchain, based on the current gas fees of the given blockchain.
For testing purposes you can try NFT Maker with Test API keys for free, but NFTs minted with Test API keys will not have any value, because they are minted on Testnet network.
At the moment, no, unused credits do not carry over to the following month.
NFT Maker can only be used to sell NFTs created by admins to customers.
To create NFT marketplaces that allow users to sell their own NFTs, please refer to Tatum’s How to build p2p NFT marketplaces guide.
No, again, NFT Maker can only be used to sell NFTs created with the plugin.
For a complete guide on how to build the backend to an NFT marketplace from scratch, please refer to Tatum’s How to build NFT marketplaces part 2 – Backend guide.
Changelog
1.0.0
- Initial version
1.0.1
- Added deploy smart contract enough balance validation
1.0.2
- Added information about fees cost
1.0.3
- Fixed deploy NFT minor bug
1.0.5
- Fixed minor bugs
2.0.0
- Completely new version with IPFS and lazy minting support
2.0.11
- Fixed Safari date bug
2.0.12
- Fixed error with changing blockchain of NFT & Added videos & FAQ
2.0.13
- Fixed error with initial table chain column
2.0.14
- Tested with WordPress 5.7.2
2.0.15
- Tested with WordPress 5.8.2
2.0.20
- Fixed error with sold and created date
2.0.21
- More FAQ added
2.0.24
- Fixed timeout limit
2.0.25
- Added better integration for description and name to the OpenSea. Also name of the NFT in the metadata is taken from the title of the product not from the image name.
2.0.26
Changed author of the plugin
2.0.27
Added support for Testnet & detailed info about minted NFTs & more validation messages
2.0.28
Fixed API key submit validation
2.0.30
Fixed activator lazy nft testnet field & strip HTML and special chars from IPFS metadata
2.0.31
Removed open sea link and changed eth testnet link to sepolia
2.0.32
Added user agent header
2.0.35
Added user agent header – edit
2.0.36
Fixed setup API key error
2.0.37
Added deprecated info