Simple Shipping Labels for WooCommerce Plugin
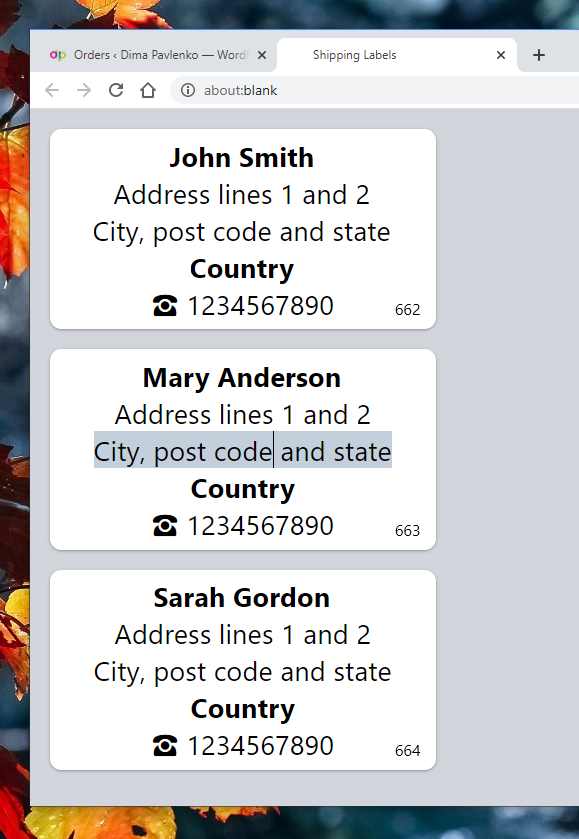
Generate a page of simple shipping labels from WooCommerce orders and print on any continuous feed label printer via browser print dialogue.
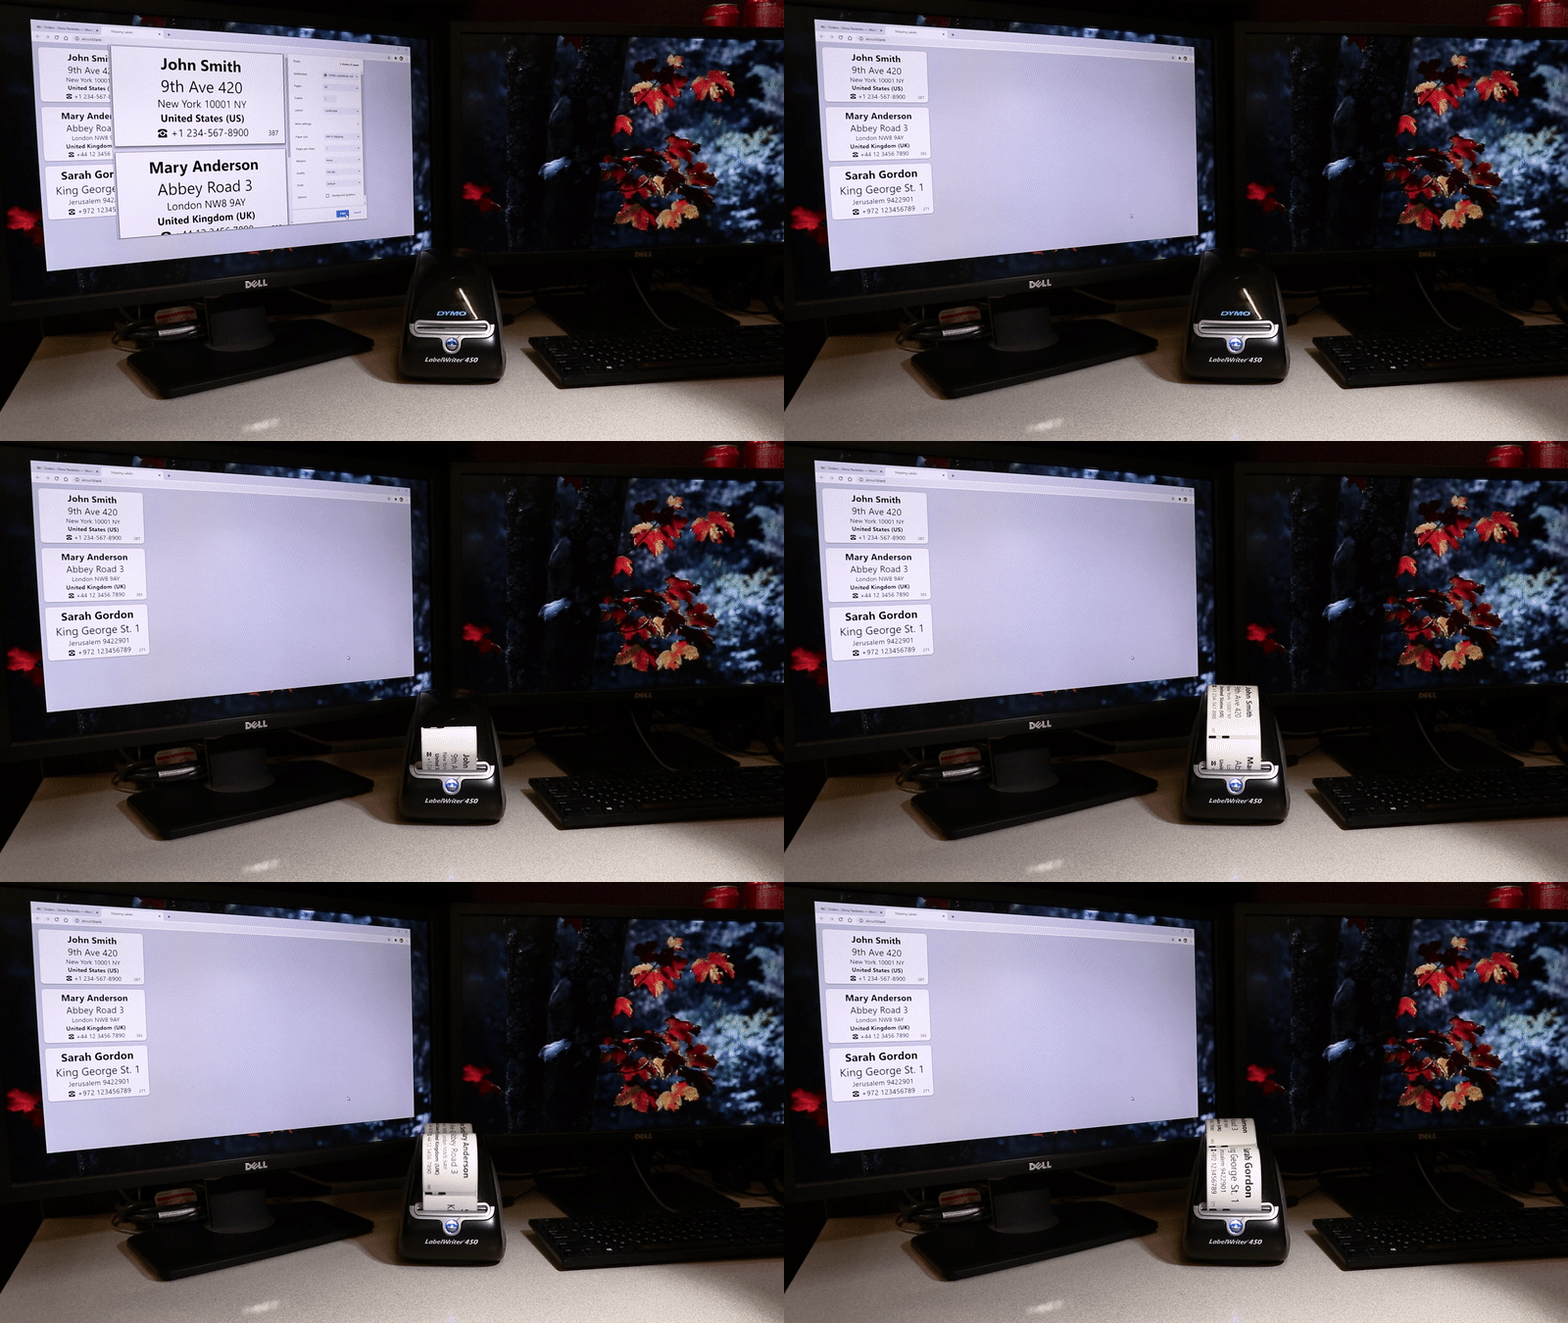
Generate a page of simple shipping labels from WooCommerce orders page and print on any continuous feed label printer (usually a thermal printer) via the browser print dialogue (Ctrl + P).
Advanced customization
For advanced label styling checkout Simple Shipping Labels Pro
Main features:
- Custom label size
- Custom label padding
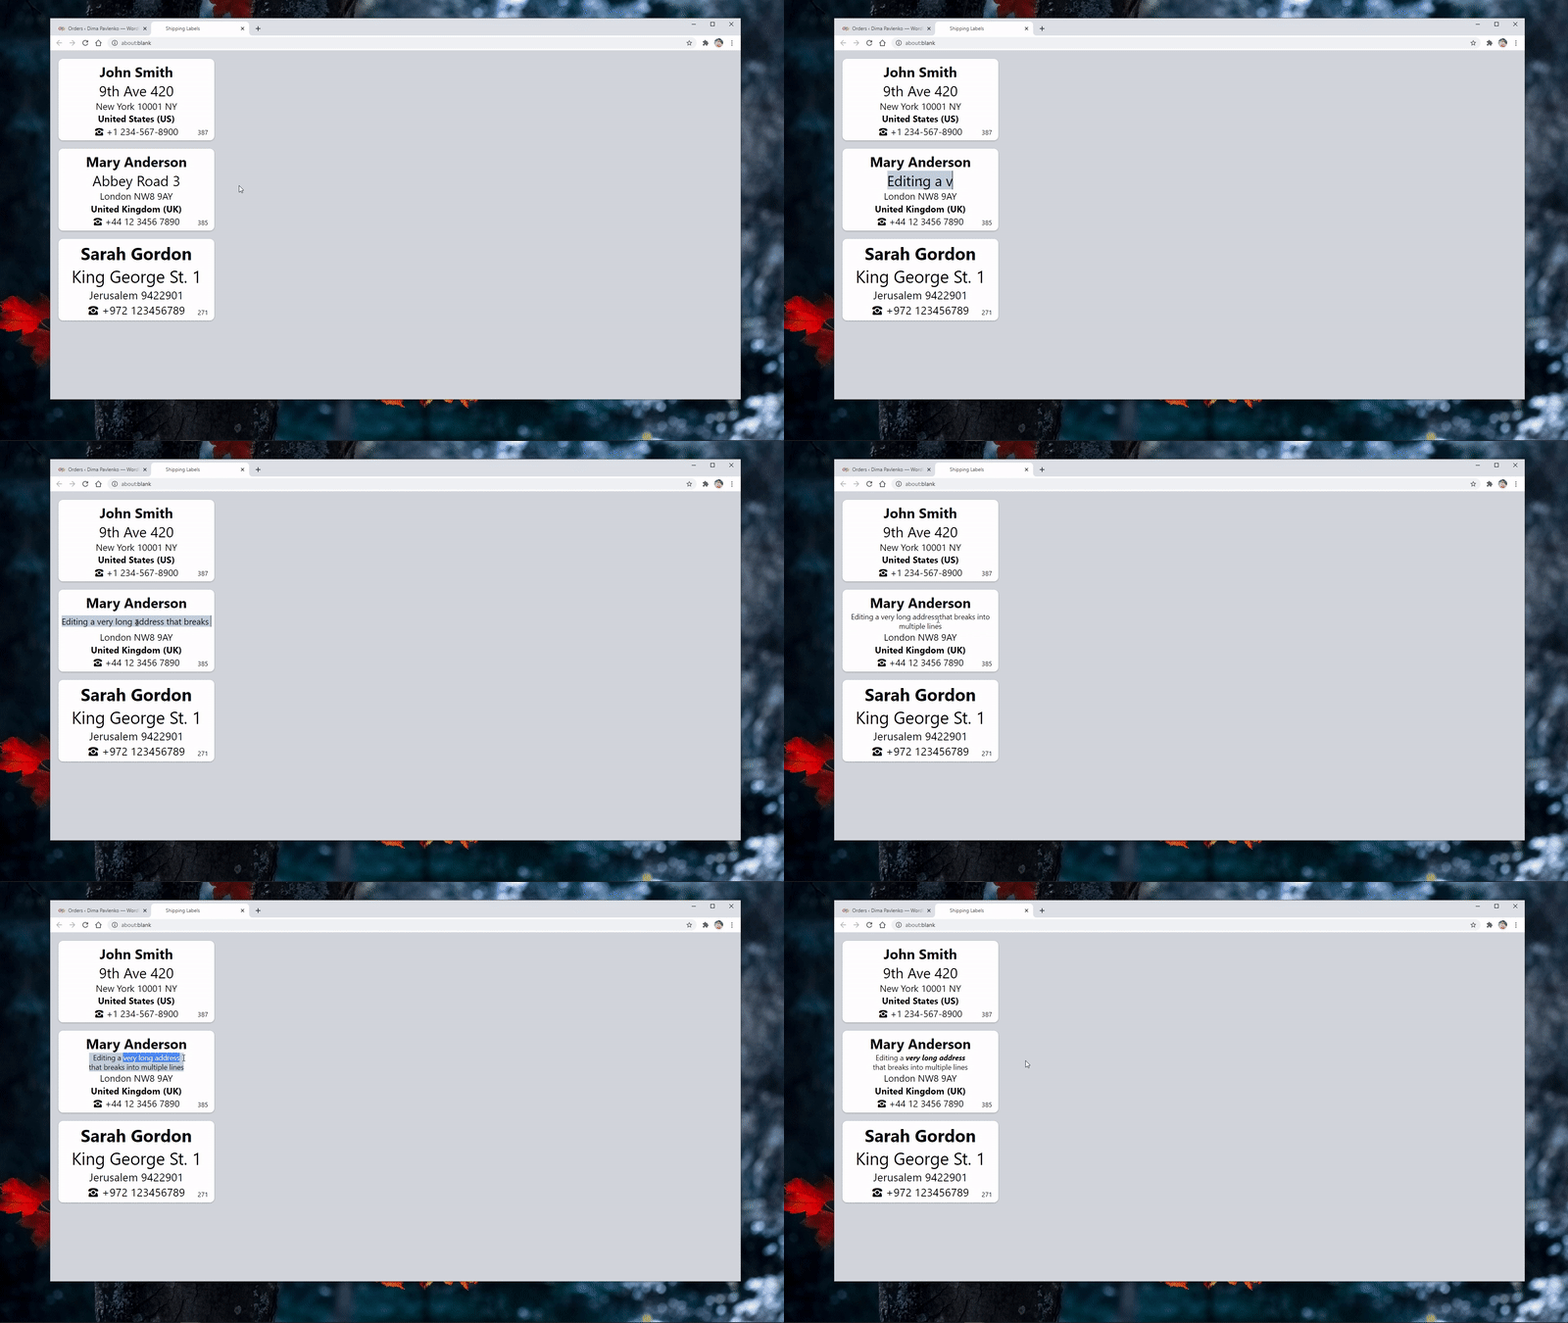
- Edit labels before printing
- Auto fitting text fields
- RTL support
- Hide country for local orders
- Country/state displayed in English for international orders
Installation
Installation
- Install using the WordPress built-in Plugin installer, or extract the zip file and drop the contents in the
wp-content/plugins/directory of your WordPress installation. - Activate the plugin through the Plugins menu in WordPress.
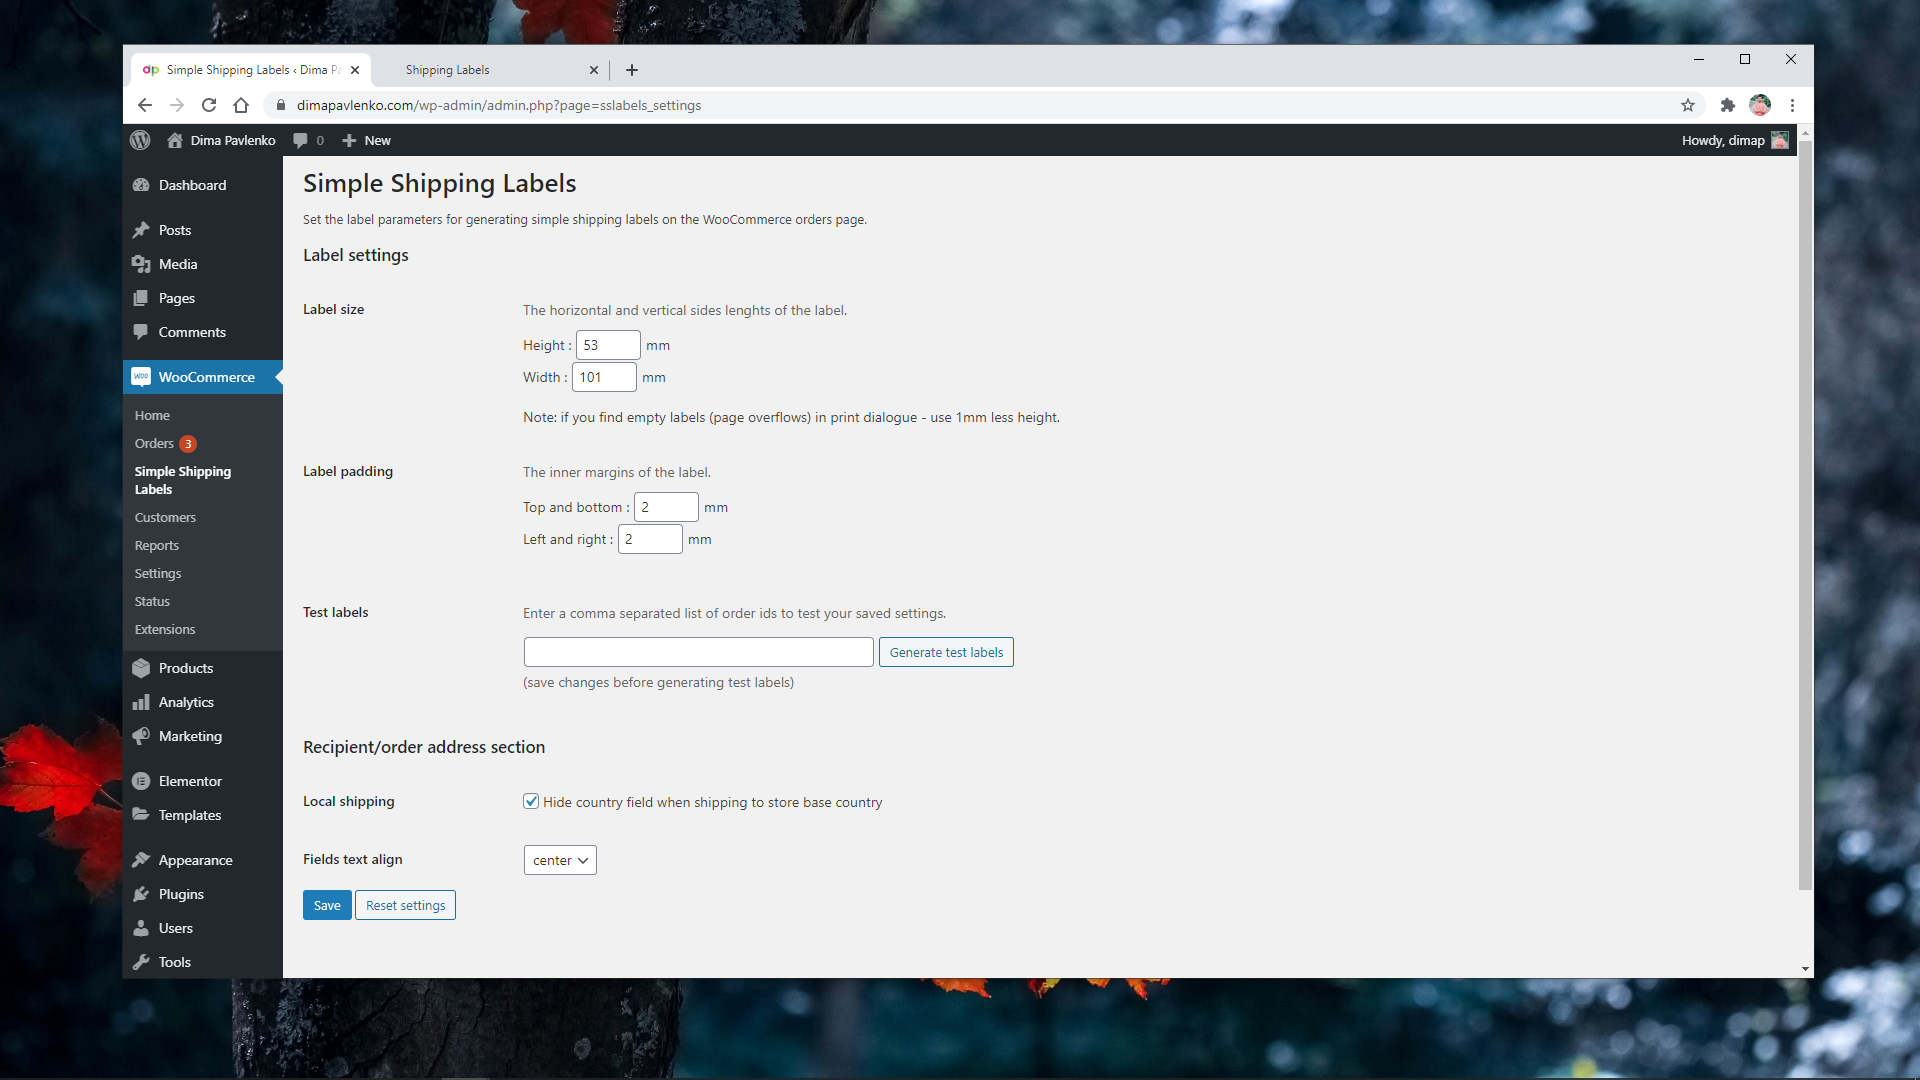
- To edit label settings go to WooCommerce > Simple Shipping Labels submenu.
- Save your changes and generate test labels directly from plugin settings page.
- Make sure to properly setup your label printer in operating system and set the correct paper (label) size.
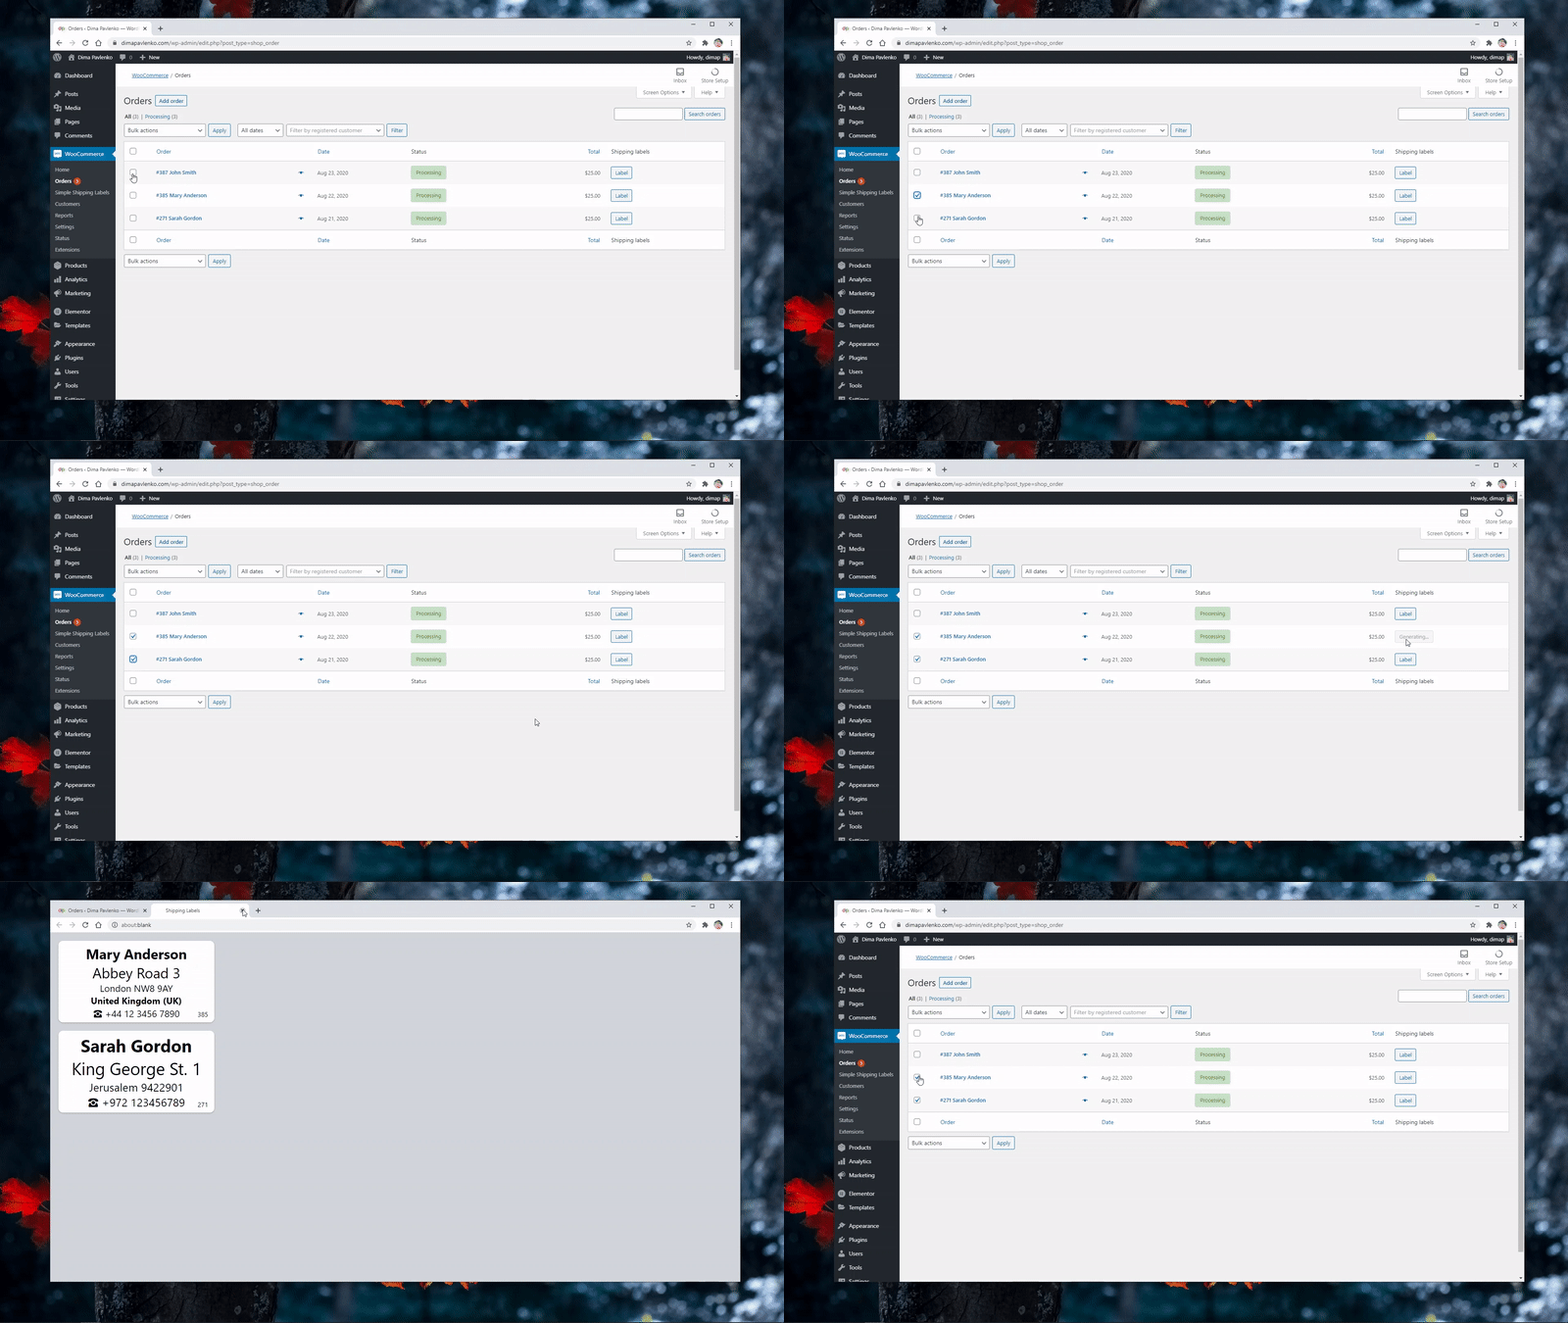
- To generate labels page from WooCommerce orders – go to WooCommerce > Orders, click the ‘Label’ button of any order or select multiple orders first.
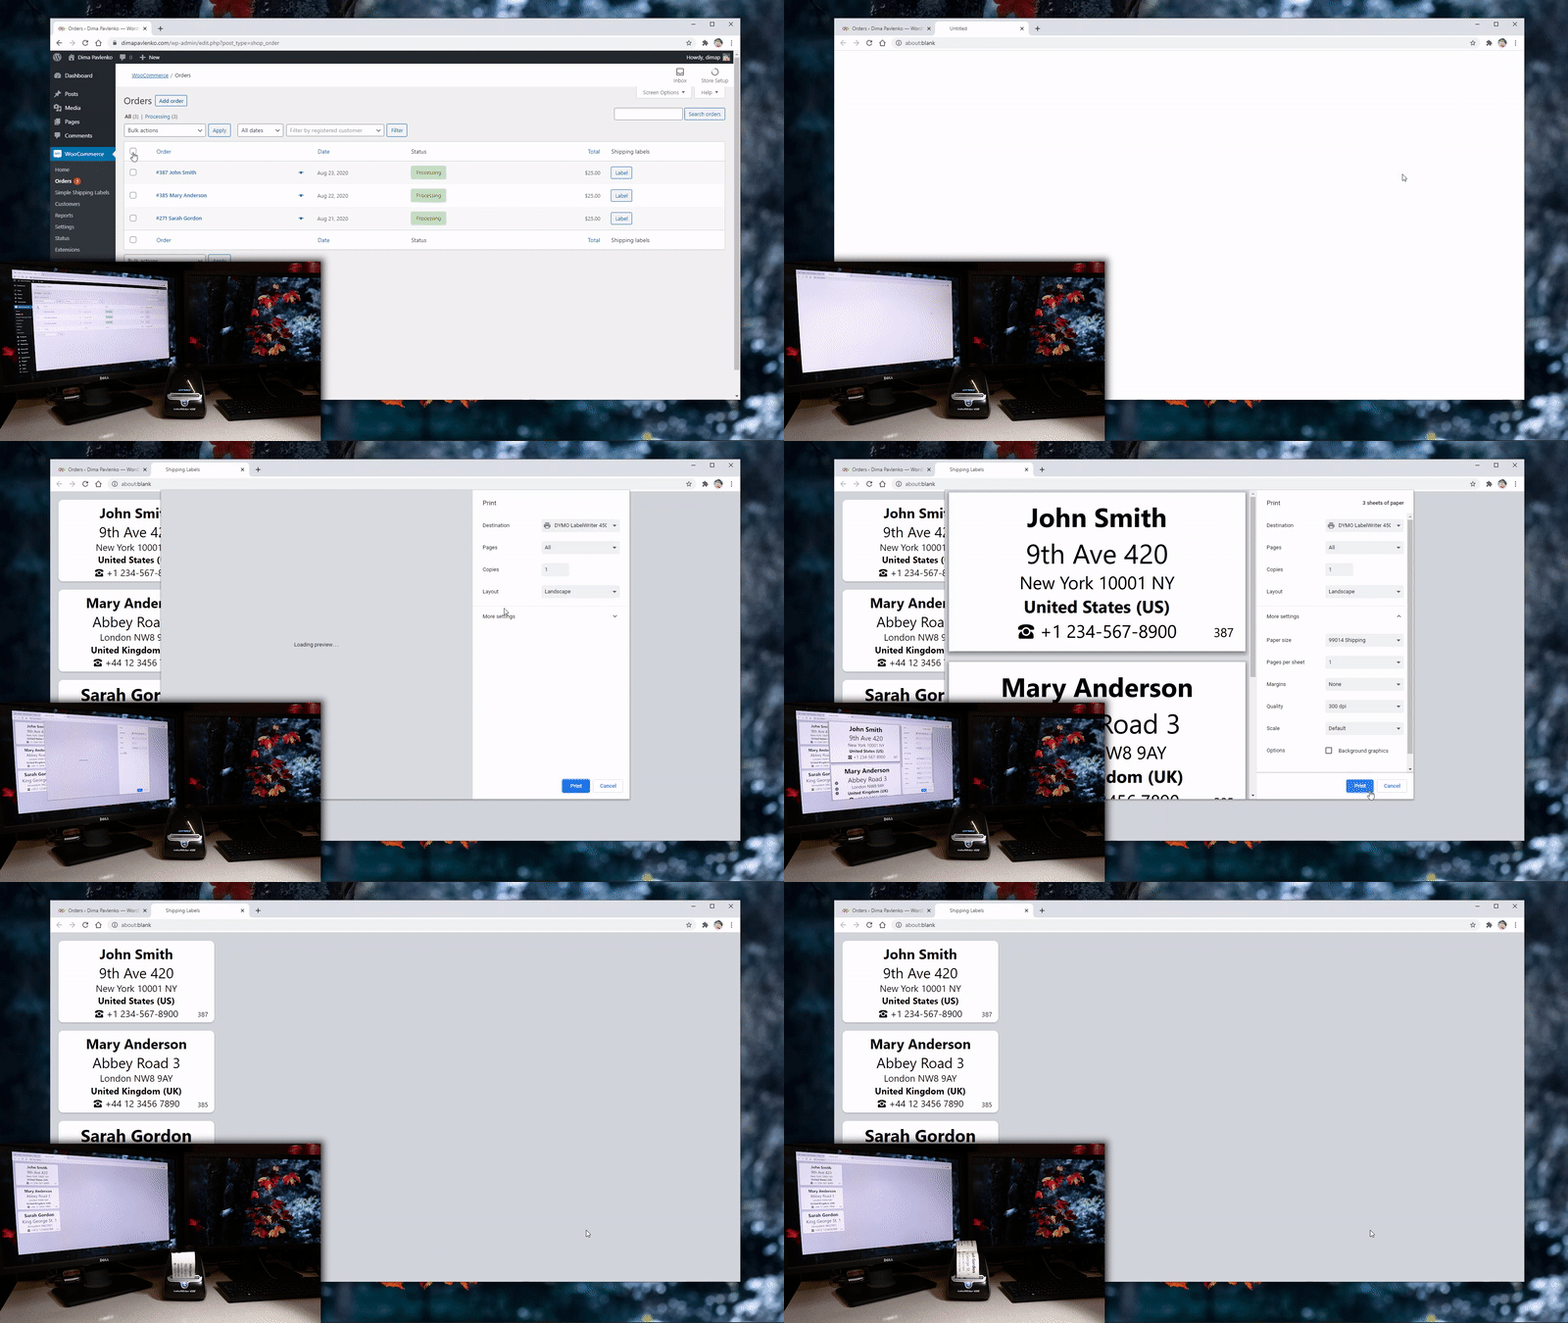
- To print the labels – open the print dialogue (Ctrl + P) in the generated labels page, select your label printer, in advanced settings remove the default page headers, footers and set margins to ‘none’.
For additional support or questions visit plugin page.
Screenshots
FAQ
This plugin was developed for use via Google Chrome browser, since it has enough print control options in the print dialogue.
Other browsers, Safari for instance, lack some basic settings like setting page print margins to none, causing either page overflows or wasting printable area.
Things to check:
* In Chrome browser > Settings > Privacy and security > Site Settings > Content > Pop-ups and redirects – if the site is listed under “Not allowed to send pop-ups or use redirects” remove its entry.
* In case your browser has AdBlock plugin installed (or any similar ad blocking extension) – enable your site pop-ups there.
Things to try:
* Observe the console in developer tools (in Chrome press F12).
* Check the plugin on other site – preferably with up to date WordPress and WooCommerce installations.
* Update WooCommerce.
* Temporarily enable WordPress DEBUG mode and logs (preferebly in a staging environment) – explore for any errors or conflicts.
Go to the plugin settings page in WordPress dashboard > WooCommerce > Simple Shipping Labels and set various label parameters.
The most important thing is to make sure you’ve installed the drivers for your printer and set the correct label size in printer settings.
You will find your DYMO / Brother label printer model drivers on their corresponding websites, usually under “Support” or “Downloads” pages.
Regular printers are “plug-n-play” since they use default page sizes like A4, while label printers need a bit of configuration, since there are a lot of weird available label sizes for each. Once you install the drivers, you should see all the supported label sizes in the printer options/settings, that should then be listed in the Chrome print dialogue for you to choose.
I suggest watching a few tutorials on YouTube of the model you consider or purchased, see if there are any reviews and constructive comments under the videos. Even go to the extent and check which one has cheaper 3rd party labels on eBay/Amazon.
Every label detail field is editable. Use Enter key for adding line breaks and keyboard shortcuts: Ctrl+B (bold) | Ctrl+I (italic) | Ctrl+U (underline). Every field automatically adds a line break once there is enough place for two lines.
For some label sizes you may want to use different orientation.
Google Chrome browser print dialogue can help to achieve it natively:
- Switch the label height/width values in plugin label settings.
- In browser print dialogue choose Layout > Portrait.
The Simple Shipping Labels Pro provides a few additional features, but here are a few alternatives and ideas to consider first:
1. Branding/sender/return address section – static info and logos can be printed separately in large quantities and color, thus can be designed in any editor, printed locally or via 3rd party services, such as noissue / StickerMule or your local printing houses, and many more creative packing solutions like custom packing tape.
2. Custom CSS – the plugin code is simple and well documented, one with basic HTML/CSS/JavaScript/PHP/WordPress understanding can modify the code to achieve business specific design or behaviour.
3. Order items – simple table of order items, great for further code customization, since it has most of the useful API/logic figured out for any beginner developer to modify.
Changelog
1.0.7 – 2024-02-05
- Fix: Refactored code base to support WooCommerce HPOS (“High Performance Order Storage”), based on the official Upgrade Recipe Book.
- Feature: Switched CSS font size units from pixels (px) to milimeters (mm), for label settings units uniformity (e.g., label size).
- Feature: Added default & max font size settings, with an option to disable text auto-fit.
1.0.6 – 2023-04-07
- Fix: Handle some label generation PHP exceptions on server – output the error on generated labels page.
- Feature: Displaying elegant icon in browser tab of the generated labels page.
1.0.5 – 2022-03-03
- Fix: Keep using recipient billing phone if shipping phone field is empty (until WooCommerce duplicates the billing phone to shipping, just as other fields, or themes expose the shipping phone field once “Ship to a different address?” checkbox is checked, showing the shipping address form).
1.0.4 – 2022-03-01
- Breaking fix/feature: Recipient shipping phone field data now comes from a dedicated order shipping phone field, which was added in WooCommerce 5.6 release.
- Feature: New recipient details layout – postal code before city.
- Feature: Replace order id with get_order_number() function, to support Custom Order Numbers plugin.
- Feature: Split settings page sections into separate tabs.
- Feature: Print label button in order details page.
- Feature: Added link to settings page from plugins page.
- Feature: Added local/international label class name as a discriminator to distinguish between internal/external destinations styles – for those who manually edit the plugin code and label style (use if for conditional styling).
1.0.3 – 2021-06-01
- Fix: settings page script and style enqueue ‘undefined index’ error notification.
1.0.2 – 2021-04-02
- Fix: Destination postal code moved after state, in accordance with international addressing requirements.
- Fix: Enabled order id field editing.
- Feature: Setting to show/hide order company field.
- Feature: Setting to show/hide order phone field.
- Feature: Setting to display order state abbreviation or full name.
- Feature: Setting to show/hide order total (some local shipping carriers require this info).
- Feature: Setting to select destination details layout (useful for larger labels).
- Feature: Setting to auto-open print dialogue when label page is generated.
1.0.1 – 2020-12-12
- Fix: Updated text auto-fit function to handle pasting formatted text as plain text.
1.0.0 – 2020-09-05
- Initial Public Release.
