Quick Restaurant Menu Plugin
Create easily restaurant menus with drag and drop.
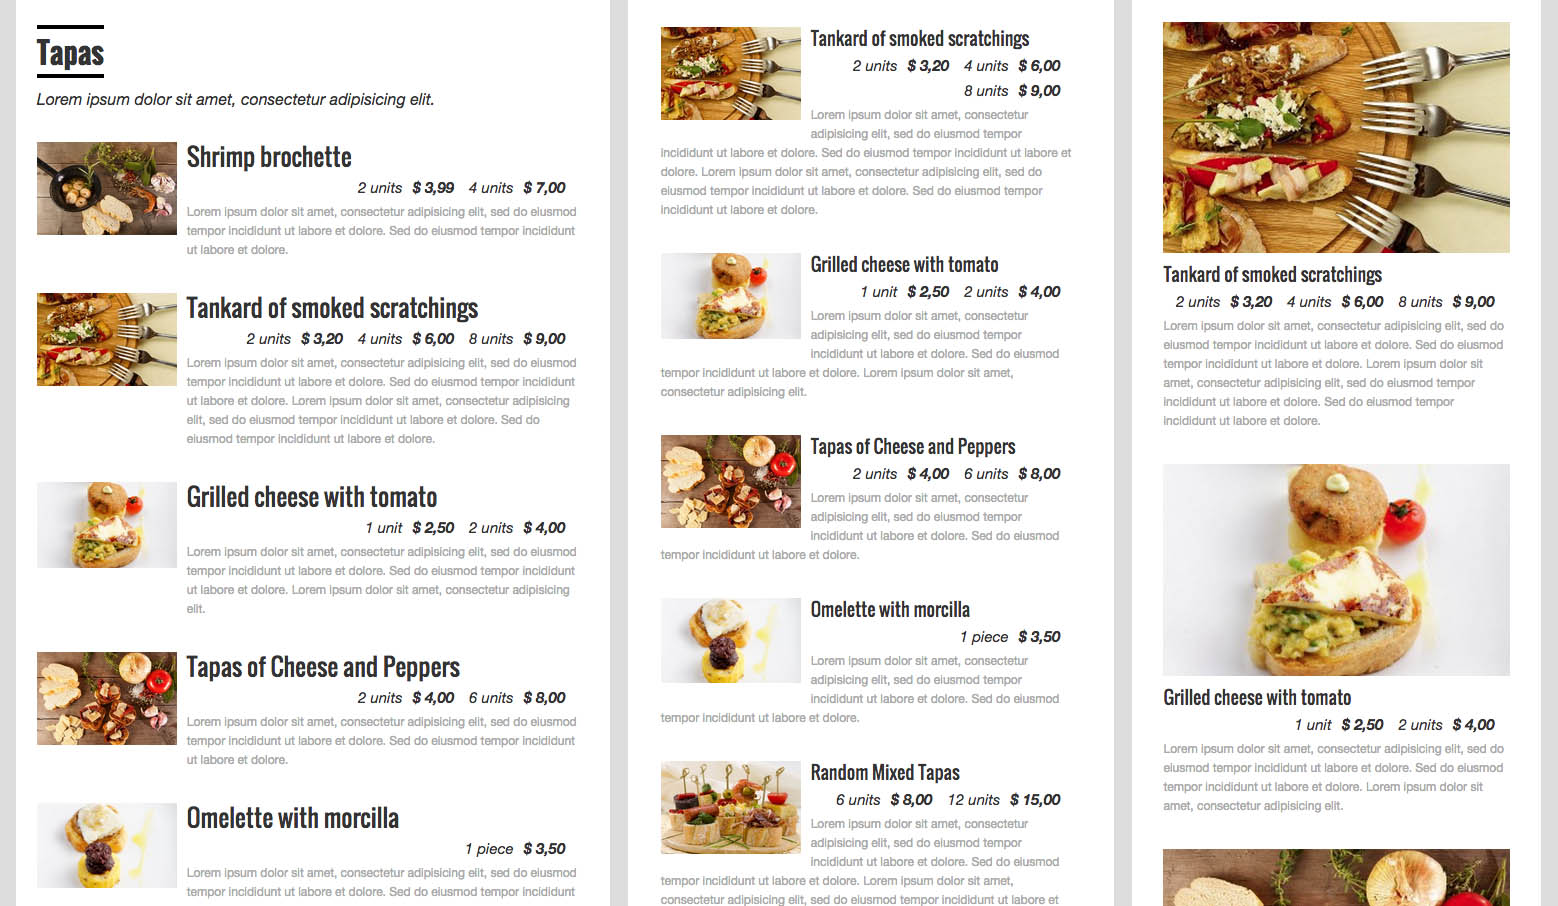
Quick Restaurant Menu allows you to create quickly menus for eateries, cafes, bars and restaurants. You can include images, descriptions, sizes and images.
Quick Restaurant Menu Features
The plugin uses default WordPress functionality. Creates two new post types, Menus and Menu Items, which are used to construct the menu. You can create and edit menu items inside the menu post interface, rearrange them with drag and drop, and group them into sections. Then use a shortcode to display it in posts and pages.
- Unlimited menus and items
- Menu sections
- Add header and footer to each menu
- Menu items with picture, description, sizes and prices
- Responsive menu layout for mobile viewing
- Drag and drop interface
- Insert custom CSS
PRO Features
- Not only Section, organize your menu with Rows & Columns
- Powerful Drag & Drop builder
- Copy / clone menu items from inside the menu
- Add menu items on the fly from a searchable list
- Add list with prices with title, normal price and sale price
- Add nutrition facts and diet tags to each menu item
- Display with different layouts: expanded, dropdown, horizontal tabbed, vertical tabbed
- Lightbox with pictures
- Popup with menu item details
- Each menu item has it’s own page and is searchable
- Share your menu items in facebook, google-plus, twitter, pinterest and linkedin
- Customize your menus with lots of options
- Select colors and font families
- Image resolution and size
- Images with subtle shadow
- Font size, line heights and margins
Make sure to review the PRO version of Quick Restaurant Menu page for more detailed information.
How to use
Add the shortcode of the menu in any existing post or page:
[erm_menu id=123] If you want to hide the thumbnails:
[erm_menu id=123 thumb=no] Translations
- Spanish ( Español )
- Norwegian ( Thanks to Ole Petter Holthe-Berg )
Installation
- Unzip the plugin and upload it to your site’s wp-content/plugins/ folder.
- Activate Quick Restaurant Menu trough the “plugins” area in your WordPress dashboard
- A new menu item called “Rest. Menus” will appear in your dashboard navigation. Go there and start creating menus.
Screenshots
FAQ
Click on Rest. Menus in your WordPress admin sidebar. Click on Add New to create your first entry and save the post.
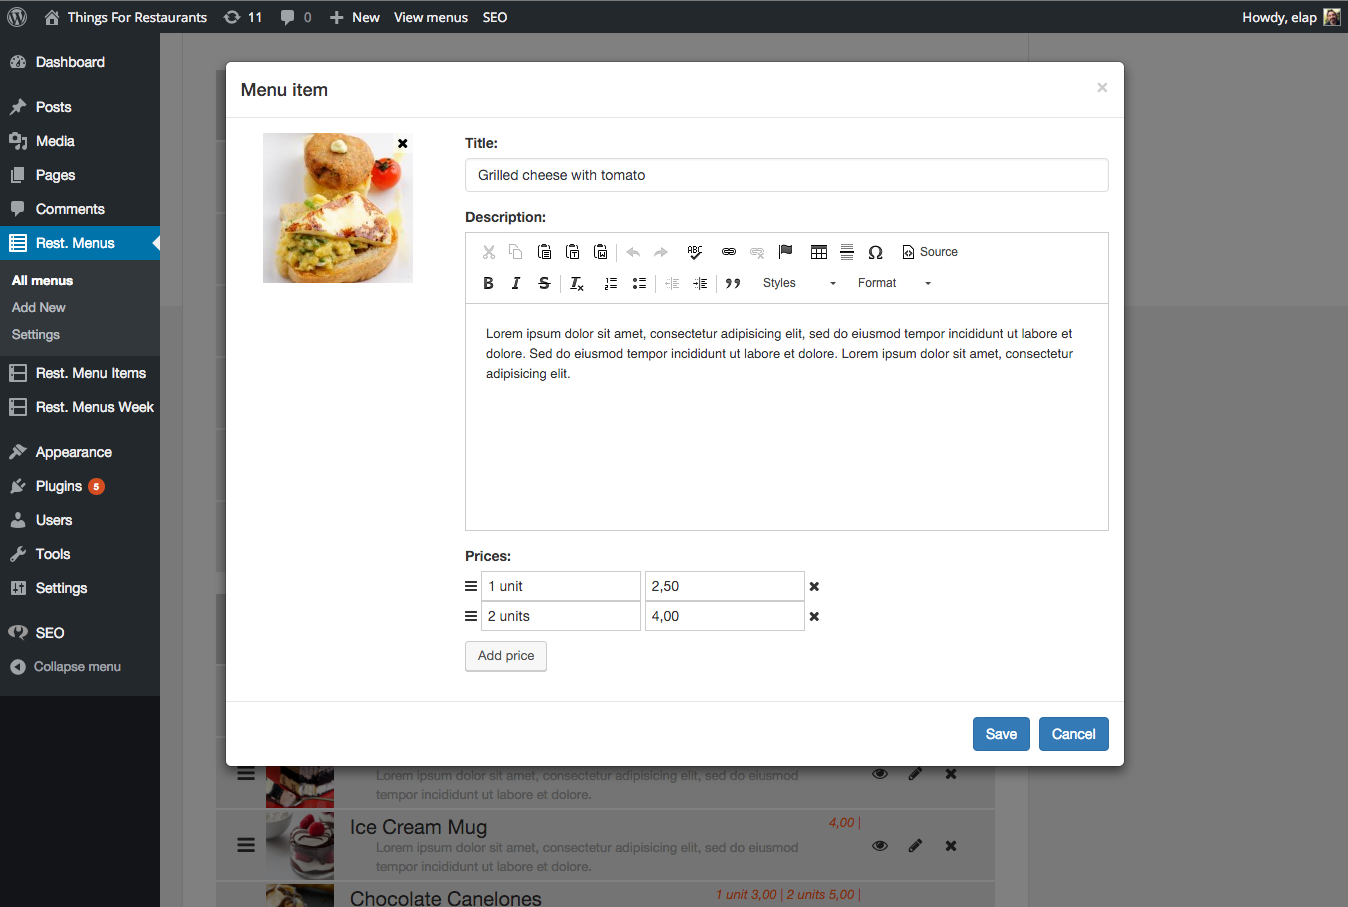
You will see a window inside the post editor with two buttons, one to insert new Menu Items, and the other to add Section Headers.
Add the items you want and provide them with a title, picture, description, sizes and prices. Each item has three icons on the right: to hide in the front, to edit the item and to delete the item.
Group your items inserting Section headers, eg. Starters, Lunch, Dinner, Breakfast, Desserts, etc.
After saving your menu post create a new Page. Simply click on Pages -> Add New in your WordPress admin sidebar. Give your new page a title, for example, The Menu.
To display your menu in a simple list, use the shortcode with the id of the menu. You will find the shortcode in the table list of menus or inside the menu editor.
[erm_menu id=123] Click on Rest. Menus Week in your WordPress admin sidebar. Click on Add New to create your first entry and save the post.
Add different schedules and assign a menu to each one.
Reorder the schedules with drag and drop.
Insert the shortcode in some page/post.
The page will display the menu that satisfies the first schedule rule. If no rule is satisfied then no menu will be displayed.
You can create rules for different days and for different hours.
You don’t need to insert the currency on each price. Just go to Rest. Menus -> Settings, insert your currency and in with position you want it to display: before or after the price.
You can customize your template in the front end. Go to Rest. Menus -> Settings, insert your CSS and check Insert Custom CSS.
The plugin uses two types of custom posts, one for Menus and other for Menu Items. You can edit your Menu Item from inside de Menu Editor, but you can also edit it from the Menu Item post editor.
The Rest. Menu Items menu is hidden in your admin sidebar, but you can show it from the settings. Go to Rest. Menus -> Settings to unhide it.
Now you will see a new Rest. Menu Items menu in your admin sidebar. You can also edit you Menu Item from here, but you need to add your new items from the Menu Editor.
You can use the support tab here, or visit the plugin website.
Changelog
2.1.0
- Bugfixes
2.0.2
- Use tinyMCE as description editor
2.0.0
- Updated menu builder interface
- Updated to WP last version
1.7.1
- Small fixes at the backend editor
1.7.0
- Menu items new loop
- New hooks added to the menu template
- Menu items does not have a front-end template
- Small fixes
1.6.6
Added new translation to Norwegian
1.6.5
- New setting: optional rewrite menu slug from qr_menu
- Admin modal window ready for translation
- Google fonts url changed to //
1.6.0
- Fixed menu item visible bug
- Menu item is searchable and has it’s own page
1.5.5
- Added new class to menu
- Added ID to menu
- Fixed bug with screen options button
- Fixed bug when saving creating new menu item
- Product description allows shortcodes
- Minor bugs
1.5.2
- Each Menu has it’s own url now
- Bug with Yoast SEO fixed
- Changed dashboard menus
1.5.0
- Interface for editing menu item changed
1.4.2
- Fixed small bug in template for section
1.4.1
- Fixed small bug in template
1.4
- Fixed bug with prices
- Shortcode allow hide thumbnails
- Shortcode allow prices position (top, bottom)
1.3
- Fixed bug with WP 4.3
- New setting for select image size
- If some menu item has no image columns will not break
- If all menu items has no image then column image is not displayed
- Footer text now saves html tags
- Fixed bug in shortcode, now don’t break main query
1.2
- Removed anonymous functions for PHP 5.2
- Added Spanish translation
1.1
- Added variable menus.
1.0
- Plugin released.


