
Live updates from Excel Plugin
Display live updating data from your desktop Microsoft Excel spreadsheets in your WordPress blog. No file saving or importing required.
The ipushpull WordPress plugin makes it easy to automate updates from your desktop Excel spreadsheets into your WordPress pages.
Push data from Excel
- Push your data and formats at the click of a button from your existing spreadsheets with our Excel add-in. No file uploads required.
Live updates
- Update your webpages automatically as data changes in your spreadsheet. Share only the latest information with your site visitors.
Live charts too!
- Push your Excel charts automatically to WordPress too.
Take a look at this page on the ipushpull blog to see the plugin in action.
You’ll need an ipushpull account to use the plugin – sign up for a free trial here!
Features
- Display the latest data from your desktop spreadsheets in your WordPress pages
- You don’t need to save the source spreadsheet to update the data
- Your content updates automatically – the reader does not need to refresh their browser to get the latest update
- You choose the range of cells that gets displayed
- You control the update frequency – every few seconds, every hour, every day
- Data can be public or password protected
Examples
Take a look at this page on the ipushpull blog to see the plugin in action.
For more information please visit the ipushpull website and the ipushpull Help and Support Centre.
User Guide
When you sign up to ipushpull we create a Folder for you, containing live data Pages. You can then push data to these pages from desktop Excel spreadsheets, databases or any of the other applications we support.
Installation
You can install the ipushpull WordPress plugin using any of these standard methods:
Install using WordPress administrator panel
- In your WordPress admin panel, go to Plugins -> Add New
- Type ipushpull in the search box
- Click on the Install Now link below the plugin title
- After installation is finished, click on the Activate Plugin link
Upload using WordPress administrator panel
- Download the plugin ZIP file
- In the WordPress admin panel navigate to Plugins -> Add New
- Click on the Upload link
- Select the zip file you downloaded and confirm submission
- After installation is finished, click on the Activate Plugin link
Manual Upload
- Download the plugin ZIP file
- Upload the contents of the ZIP file into ‘wp-content/plugins’
- Open your WordPress administration panel
- Navigate to Plugins -> Installed Plugins
- Click on Activate Plugin link below the plugin title
After installation
- Sign up for a free ipushpull account and download and install our Excel add-in
- Create an ipushpull Page and start pushing data to it from your desktop Excel
- Make the Page Public if you want all visitors to your site to see it
Embed the page in your WordPress site using the following shortcode:
[ipushpull_page folder=”my_folder_name” page=”my_page_name” height=”300px”]
Screenshots
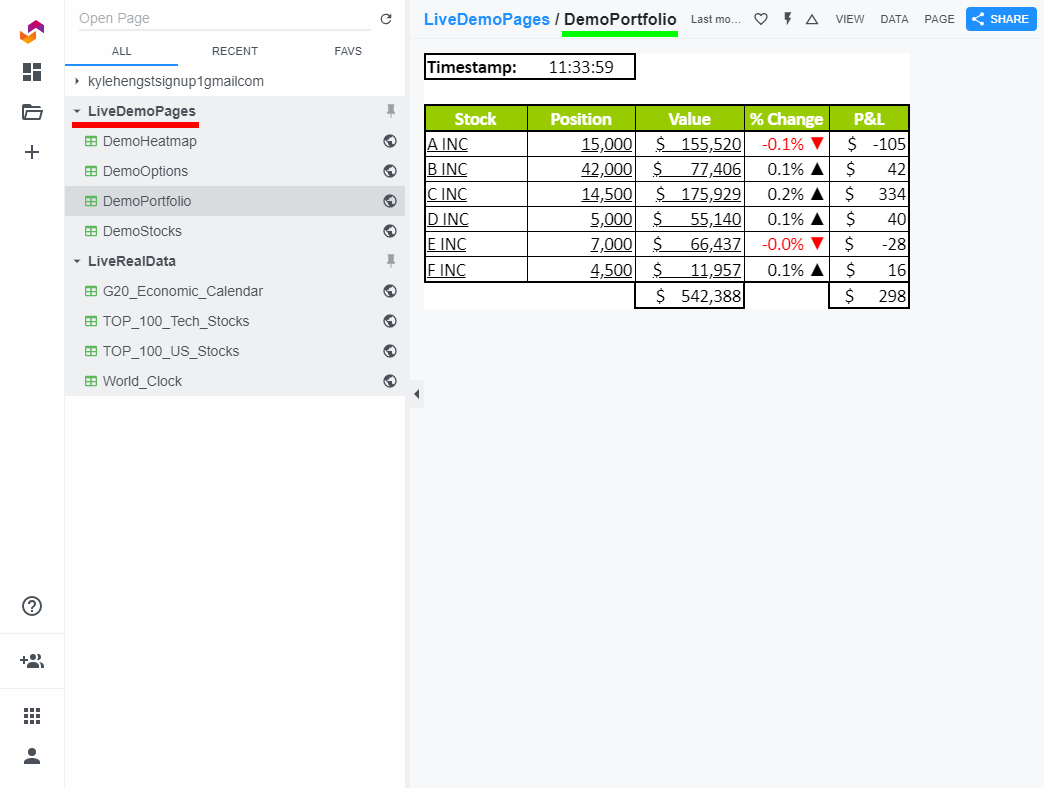
Where to find the Folder Name (Red) and Page Name (Green) in the ipushpull website so that you can insert them into your shortcode.
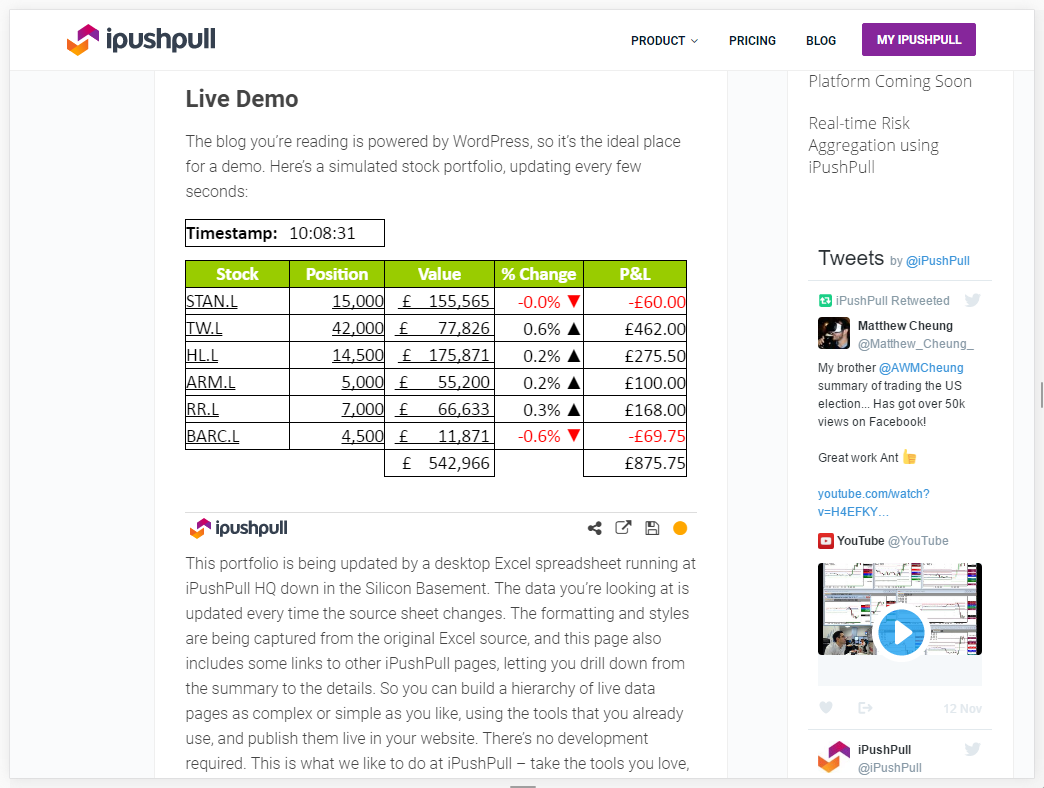
Live data from an Excel spreadsheet embedded in the ipushpull WordPress blog.
Static data from an Excel spreadsheet, showing the range of links you can embed in your pages.

Error displayed to your site visitors if you have not made your Page Public.

Error displayed to your site visitors if you have made a mistake with the Folder or Page name. Correct it and try again!
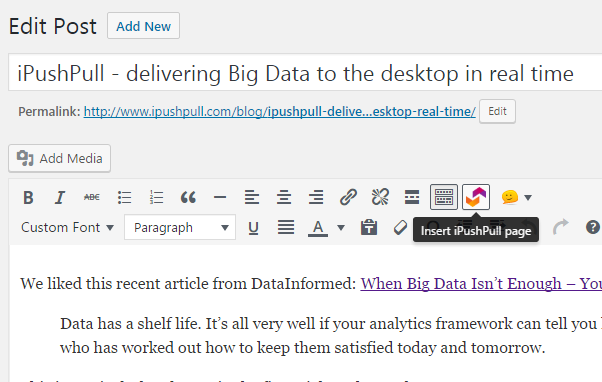
Click the highlighted button on the WordPress toolbar to start the ipushpull Shortcode generator.
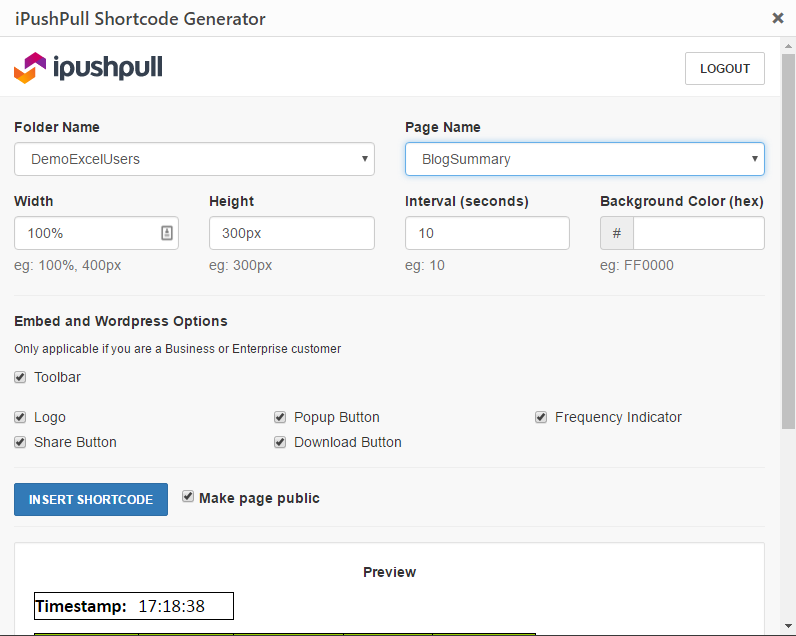
The ipushpull Shortcode Generator automatically creates shortcodes from the folder, page and other options you select.
FAQ
- Sign up for a free ipushpull account and download and install our Excel add-in
- Install the WordPress Plugin and Display live data From Excel
- Make the Page Public if you want all visitors to your site to see it
Embed the page in your WordPress site using a shortcode. Use our shortcode generator or write one like this:
[ipushpull_page folder=”my_folder_name” page=”my_page_name” height=”300px”]
More documentation can be found at the ipushpull Support Centre.
Sure – this page on the ipushpull WordPress blog includes several examples.
Yes – we have a demo ipushpull page that is constantly being updated. It’s in the folder DemoExcelUsers and is called BlogSummary. You can embed this in your WordPress page using the following shortcode:
[ipushpull_page folder="DemoExcelUsers" page="BlogSummary" height="325px"] ipushpull users with a Business or Enterprise account can control the appearance of the toolbar. For more details about these packages please see our Pricing Page.
This means that the ipushpull Page has not been set to Public. A Page has to be Public if you want every visitor to your website to be able to see it.
See this support article for instructions.
This means that you have made a mistake with the Folder or Page name in your shortcode. Correct the problem and try again.
Support pages haven’t answered your question? Email support@ipushpull.com for further help.
Changelog
1.0
- ipushpull shortcode is available to embed live pages
1.2
- Improving item displays
- Adding help widget with support information
1.3
- Readme updates
1.4
- Adding useful links and shortcuts to support
1.5
- Adding extra shortcode parameters to control toolbar appearance
- Adding extra shortcode parameter to control update interval
- Making sure plugin will work on older PHP versions
1.6
- Readme updates
- Asset updates
1.7
- Asset updates
2.0
- Added Shortcode Generator using Tinymce plugin
- Added access to web app via admin menu
2.1
- Fixed plugin settings links
- Updated admin menu
- Added support page
2.2
- Event logs
2.2.1
- Remove Beta
2.2.2
- PHP Compatibility
2.2.3
- Updated user sign up
2.2.4
- Update name
2.2.5
- Resolve login state issue
2.2.6
- Add support for Beta flag
2.2.7
- Add extras embed options
2.2.8
- Add maintenance page
2.2.9
- Responsive embed
2.2.10
- Responsive embed width check
2.3.0
- Tested with latest version of WordPress
- Embed page configurator updated
2.3.1
- Update README
2.3.2
- Remove user check
- Update support page
2.3.3
- Fix: sanitised input
2.4.0
- Fix: removed admin integrations sometimes not accessible due to security hardening
- Update: Easier access to contents and clear instructions on how to use the plugin