IP2Location World Clock Plugin
Simple world clock widget to display analog or digital clock for multiple time zone on your site. Supported local time, visitor's time and custom …
Simple widget to display analog or digital clock on your website without much hassle. IP2Location world clock gives you a range of different clock designs which is absolutely free. Supported local time, visitor’s time and custom time zone selection.
Features
- World clock widget enable you to easily embed into your website in anywhere
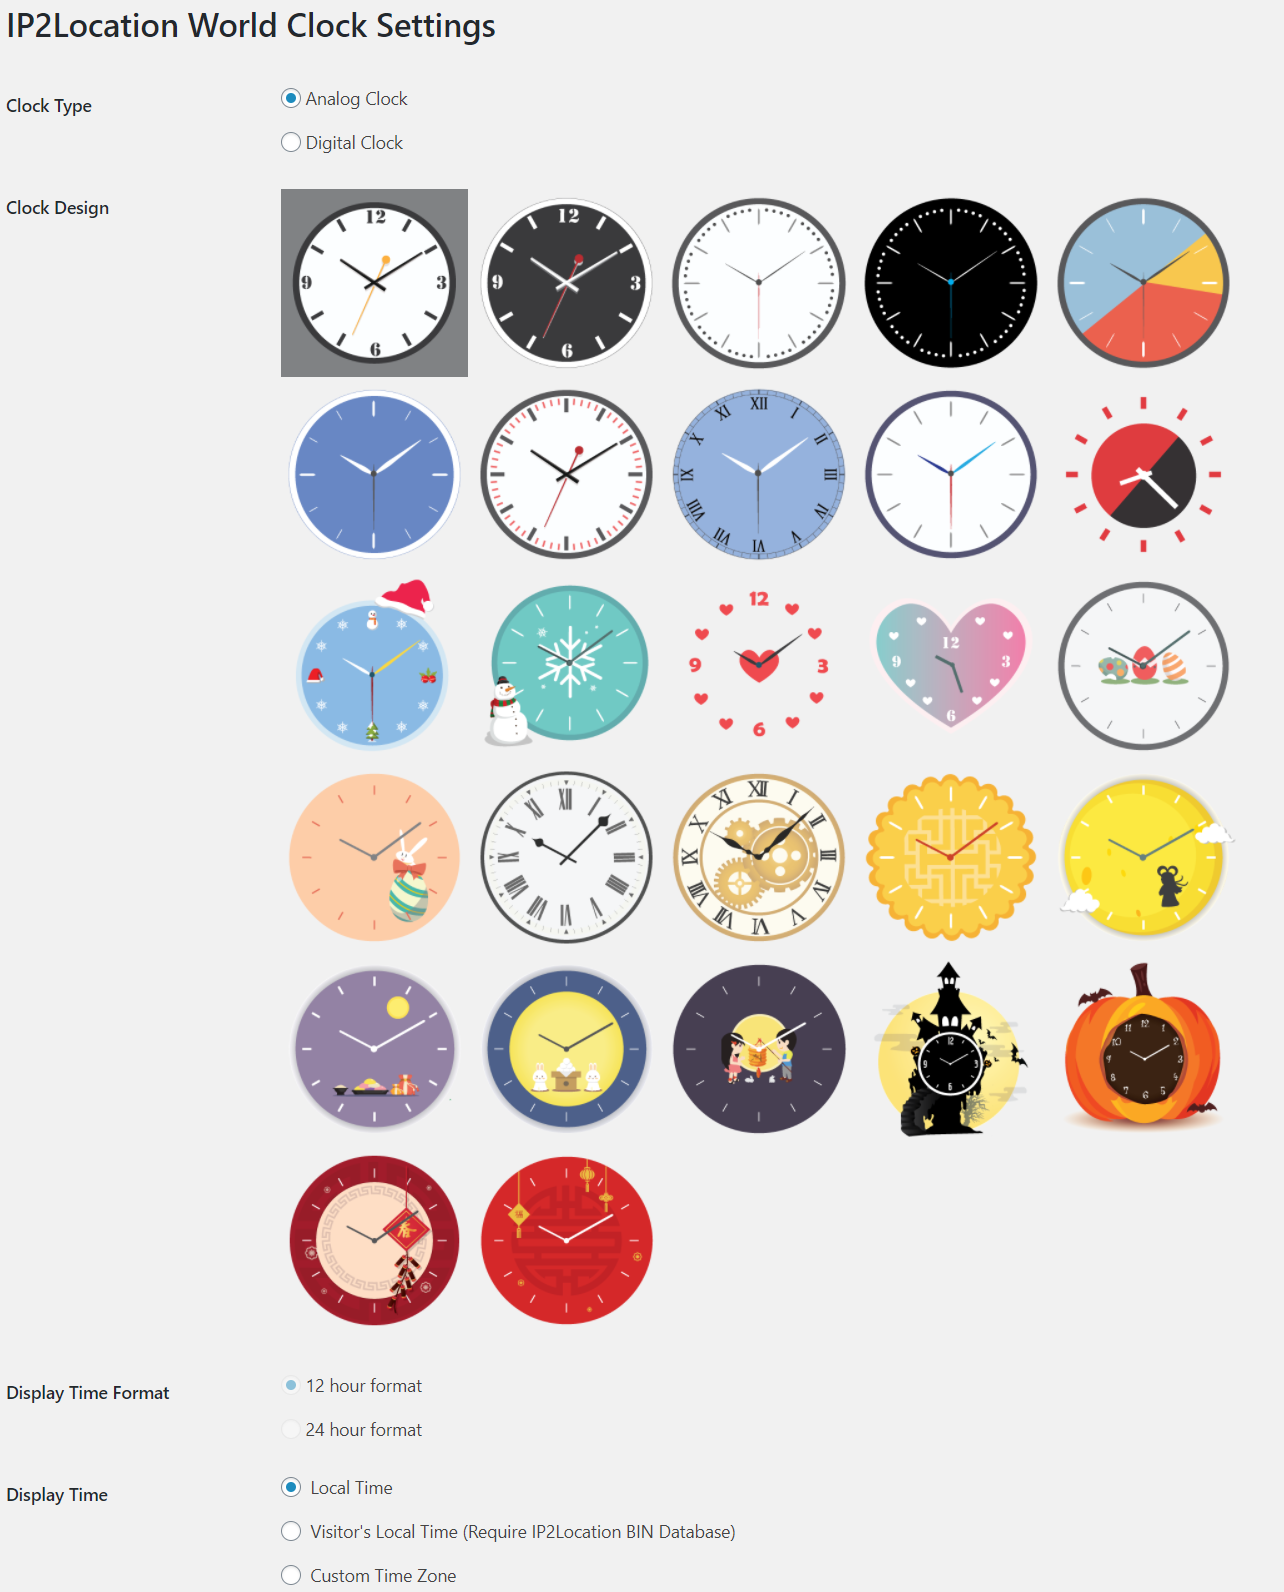
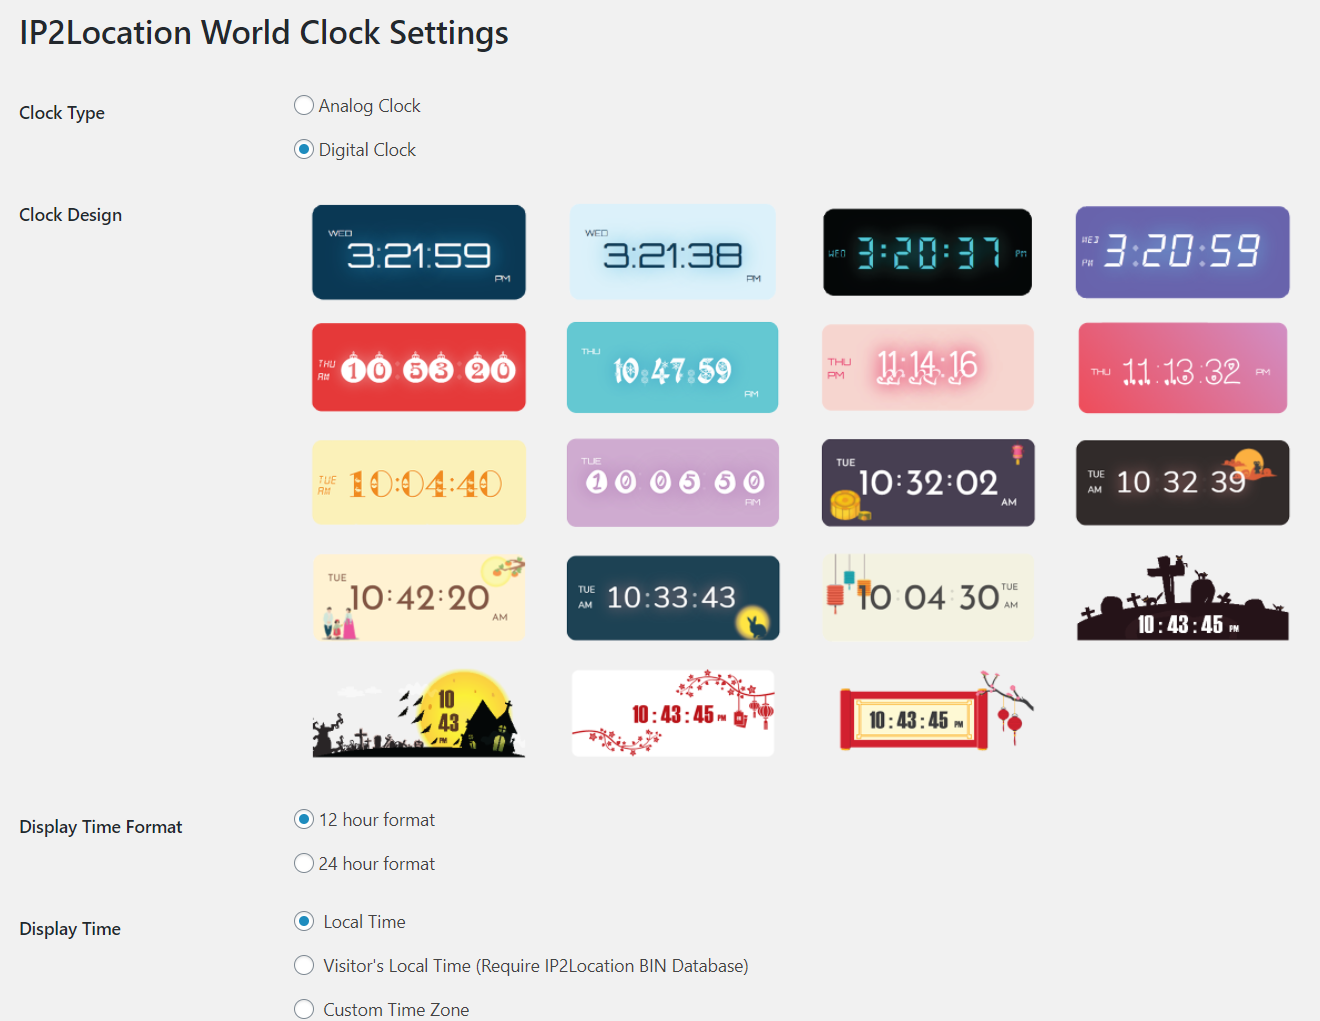
- 46 different clock designs to choose from and the list is still growing
- 3 option of time selection (local time, visitor’s time and custom time zone).
- Support 12 hour or 24 hour time format for digital clock.
- Can be added via shortcode [ip2location_world_clock], please refer FAQ section for shortcode parameters.
Installation
Using WordPress Dashboard
- Select Plugins >> Add New.
- Search for “IP2Location World Clock”.
- Click on Install Now to install the plugin.
- Click on Activate button to activate the plugin.
- Download IP2Location database from https://lite.ip2location.com/ (Free) or https://www.ip2location.com/ (Commercial)
- Decompress the .BIN file and upload to
wp-content/uploads/ip2location. - After installing you can see “Dashboard” a new menu “IP2Location World Clock”.
- Choose clock design and display time.
- Save Changes.
- Go to Dashboard >> Appearance >> Widget.
- Set it your sidebar
Manual Installation
- Download and unzip the plugin. Upload the unzipped folder to the wp-contents/plugins/ip2location-world-clock` directory.
- Activate the plugin through the ‘Plugins’ menu in WordPress.
- Download IP2Location database from https://lite.ip2location.com/ (Free) or https://www.ip2location.com/ (Commercial)
- Decompress the .BIN file and upload to
wp-content/uploads/ip2location. - After installing you can see “Dashboard” a new menu “IP2Location World Clock”.
- Choose clock design and display time.
- Save Changes.
- Go to Dashboard >> Appearance >> Widget.
- Set it your sidebar.
Screenshots
FAQ
Go to Dashboard >> Appearance >> Widget and set this plugin your sidebar. Then, go to menu page to select your clock design and display time.
Yes, if you are going display the visitor’s time. You can download the latest IP2Location Database BIN file from https://lite.ip2location.com/ (Free) or https://www.ip2location.com/ (Commercial). Please take note to download the DB11 edition which contains the time zone information.
We encourage you to update your BIN file every month so that your plugin can display the correct time according to visitor’s geolocation.
Yes, the shortcode [ip2location_world_clock] is available.
The default display of shortcode is based on your settings in IP2Location World Clock Menu.
design – Use ‘a’ followed by the position of the analog clock design shown in IP2Location World Clock Menu whereas use ‘d’ followed by the position of the digital clock design shown in IP2Location World Clock Menu. The position of clock design is counted from top to bottom and left to right. For instance, use ‘a1’ for first analog clock design wheareas use ‘d5’ for fifth digital clock design.
time – Use local for Local Time, visitor for Visitor’s Local Time and custom for Custom Time Zone.
utc – Use this parameters when you are using Custom Time Zone. Values available are from -12 until +14. You may refer the values in IP2Location World Clock Menu.
Display second design of analog clock in local time
[ip2location_world_clockdesign=”a2″time=”local”]
Display fifth design of digital clock in visitor’s local time
[ip2location_world_clockdesign=”d5″time=”visitor”]
Display first design of digital clock in custom time zone of +4:00
[ip2location_world_clockdesign=”d1″time=”custom”utc=”+4″]
Changelog
1.1.7
- Tested up to WordPress 6.5
1.1.6
- Tested up to WordPress 6.4
1.1.5
- Tested up to WordPress 6.2
1.1.4
- Fixed database download issue
- Tested up to WordPress 6.1
1.1.3
- Minor fixes
- Tested up to WordPress 6.0
1.1.2
- Enhanced checking
1.1.1
- Fixed PHP warnings
1.1.0
- Added seasonal clock designs(Chinese New Year)
- Added time format for digital clock(12H & 24H)
1.0.9
- Added seasonal clock designs(Halloween Festival)
1.0.8
- Added seasonal clock designs(Mid-Autumn Festival)
1.0.7
- Added classic clock designs
1.0.6
- Minor fixes
1.0.5
- Added parameters for shortcode
1.0.4
- Added seasonal clock designs(Easter)
1.0.3
- Added seasonal clock designs(Valentine’s Day)
- Minor fixes
1.0.2
- Added plugin review
- Added feedback request
1.0.1
- Added seasonal clock designs(Christmas)
- Added shortcode
1.0.0
- Initial release

