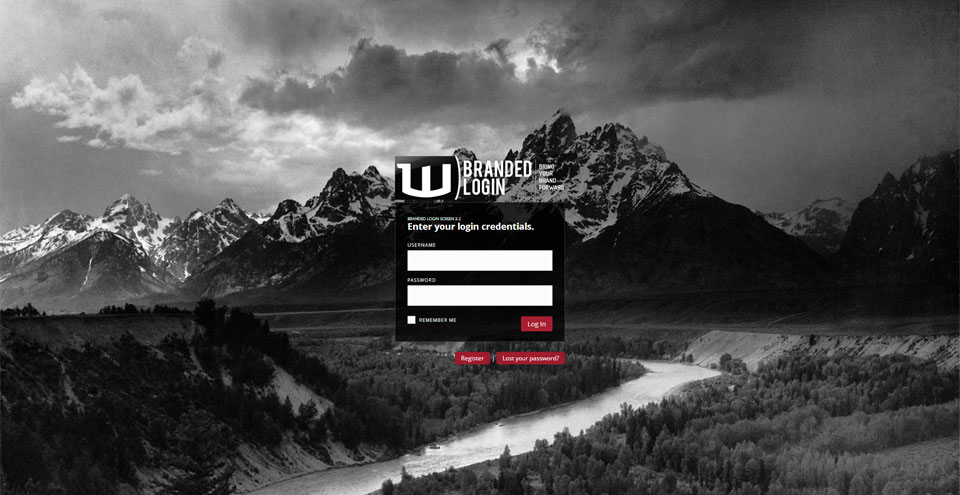
Branded Login Screen Plugin
Update the WordPress Login Screen to use a hi-res, full screen, resizing background image. Now completely responsive.
Features of the Branded Login Screen plugin:
- FULL SCREEN BACKGROUND IMAGE
- USE YOUR OWN HEADER IMAGE IN PLACE OF THE WORDPRESS LOGO
- POSITION LOGIN FORM: LEFT, CENTER OR RIGHT / TOP, MIDDLE
- LOGIN FORM IS RESPONSIVE FOR SMALLER SCREENS
- SCROLLING OF FORM IF OUTSIDE OF VIEWPORT
- BACKGROUND IMAGE SIZES WITH WINDOW RESIZE
- REPEATING BACKGROUND IMAGES SUPPORTED
- REMOVES ALL WORDPRESS BRANDING
- STILL UPGRADE PROOF
Installation
Upgrading From A Previous Version
To upgrade from a previous version of this plugin, please uninstall any existing version of the ‘Branded Login Screen’ plugin and follow the installation instructions below.
Installing The Plugin
See “Installing Plugins” article on the WordPress Codex.
Screenshots
FAQ
Find all this information and more at the “Branded Login Screen How To“.
Q) HOW TO: CHANGE THE LOGIN FORM LOCATION ON YOUR SITES LOGIN PAGE?
A) Go to the Plugins page in the Admin section of the site.
Locate the ‘Branded Login Screen’ plugin entry and select ‘Edit’. This will take you to the ‘Edit Plugins’ screen with the ‘branded-login-screen.php’ loaded and ready to edit.
Scroll down and look for the following line:
48 define( 'BLS_LOCATION', 0 ); On unedited versions of the plugin it is line 48.
Change the value to coordinate with your desired location for the login form.
- 0 – Middle-center
- 1 – Middle-left
- 2 – Middle-right
- 3 – Top-center
- 4 – Top-left
- 5 – Top-right
Click on the ‘Update File’ button below the edit textbox.
Check the wp-login page to make sure changes have taken affect.
Q) HOW TO: CHANGE THE LOGIN HEADER IMAGE?
A) Go to the Plugins page in the Admin section of the site.
Locate the ‘Branded Login Screen’ plugin entry and select ‘Edit’. This will take you to the ‘Edit Plugins’ screen with the ‘branded-login-screen.php’ loaded and ready to edit.
Scroll down and look for the following lines:
53 define( 'BLS_HDR_LOGO', 'header.png' ); 54 define( 'BLS_RHDR_LOGO', 'header-sm.png' ); On unedited versions of the plugin it is lines 53 & 54.
These 2 settings are the full-sized header logo image (BLS_HDR_LOGO) and the responsive header logo image (BLS_RHDR_LOGO).
The full-sized header is 340px X 87px (w x h). Your image doesn’t have to be that wide but if it is taller the bottom will be cropped.
The responsive header is the same height but is only 260px wide. Again if it is taller or wider it will be cropped.
It is best to make 2 images, one for each mode although if properly laid out, 1 image could work for both states. If you decide to use one image, you will have to make 2 copies and place in the appropriate folders.
The full-sized header logo image should be placed in the following folder:
‘/branded-login-screen/assets/i/logo_main/’
The responsive header logo image should be placed in the following folder:
‘/branded-login-screen/assets/i/logo_responsive/’
If the image names are not the default names ( header.png & header-sm.png ), you will need to edit lines 53 & 54 mentioned above with the appropriate names.
Click on the ‘Update File’ button below the edit textbox.
Check the wp-login page to make sure changes have taken affect.
Q) HOW TO: CHANGE THE BACKGROUND IMAGE?
A) Go to the Plugins page in the Admin section of the site.
Locate the ‘Branded Login Screen’ plugin entry and select ‘Edit’. This will take you to the ‘Edit Plugins’ screen with the ‘branded-login-screen.php’ loaded and ready to edit.
Scroll down and look for the following lines:
50 define( 'BLS_FULL_SCREEN', true ); 51 52 define( 'BLS_BG_IMG', 'default-img.jpg' ); If you are using a full-screen background image simply upload the new image to the plugins ‘/assets/i/background_image’ folder. If the image has a different name than on line 52 (default-img.jpg), edit line 52 to match the image name you uploaded.
If you are using a repeatable image for the background, on line 50 change true to false (no quotes). This will of course require the new image to be uploaded to the ‘/assets/i/background_image’ folder and an edit of line 52 if the image name is not the same as the image name on that line.
Click on the ‘Update File’ button below the edit textbox.
Check the wp-login page to make sure changes have taken affect.
Changelog
3.2
- updated .css for newer versions of WordPress
- updated screenshots for WordPress plugin repository
3.1
- fixed uninstall.php typo causing php error on uninstall.
- changed PHP required version from 5.3 to 5.2.4 to match the WordPress requirement.
- changed readme.txt FAQ and Changelog
3.0
- ability to move the login screen to 6 positions on the page.
- responsive header image and responsive login form width.
- css changes to accomodate differences in WordPress 3.5+. Other minor changes to .css, .js and images.
2.1
- css changes to accomodate differences in WordPress 3.3. Other minor changes to .css, .js and images.
2.0
- Complete rewrite of the Branded Login Screen version 1.2 (which will be know as Branded Login Screen Classic going forward)


